Sharing Images
Well, we've already learned how to create a container image, either via dockerfile or by modifying a container, and we've explored some interesting commands like "docker build" and "docker commit".
Now we'll learn how to share these images, either on a local registry or on Docker Hub's own registry.
9.1. What is Docker Hub?
Docker Hub is a public and private image repository that provides various features, such as authentication systems, automatic image builds, user and organizational department management, among other functionalities.
People and companies come together, create their containers following best practices, test everything properly, and then make them available for you to use without any hassle. This is a huge help, since you won't have to waste time installing things. You can also use it to learn how to configure a specific service. To do so, just go to Docker Hub and search; someone has probably already created a container that you can use at least as a base!
Despite this convenience of finding ready-made solutions, you probably won't want to download from the internet, even from Docker's own registry (seriously), and deploy to your production environment something you're not sure how it works, what it is, etc.
To solve this problem, Docker provides some features, such as the "docker image inspect" command, which we've already seen before when we were talking about volumes, remember? At that time we used the flag "-f" and specified a search field, because the goal was to show only the part being discussed in that chapter. But "docker image inspect" goes far beyond that; without passing the "-f" flag it will return all the information contained in that image, from the base image that was used to mount points, configurations, in short, a lot of stuff. Try it:
root@linuxtips:~# docker image inspect debian
[
    {
        "Id": "sha256:f50f9524513f5356d952965dc97c7e831b02bb6ea0619da9bfc1997e4b9781b7",
        "RepoTags": [
            "debian:8",
            "debian:latest"
        ],
        "RepoDigests": [],
        "Parent": "",
        "Comment": "",
        "Created": "2016-03-01T18:51:14.143360029Z",
        "Container": "557177343b434b6797c19805d49c37728a4445d2610a6647c27055fbe4ec3451",
        "ContainerConfig": {
            "Hostname": "e5c68db50333",
            "Domainname": "",
            "User": "",
            "AttachStdin": false,
            "AttachStdout": false,
            "AttachStderr": false,
            "Tty": false,
            "OpenStdin": false,
            "StdinOnce": false,
            "Env": null,
            "Cmd": [
                "/bin/sh",
                "-c",
                "#(nop) CMD ["/bin/bash"]"
            ],
            "Image": "d8bd0657b25f17eef81a3d52b53da5bda4de0cf5cca3dcafec277634ae4b38fb",
            "Volumes": null,
            "WorkingDir": "",
            "Entrypoint": null,
            "OnBuild": null,
            "Labels": {}
        },
        "DockerVersion": "1.9.1",
        "Author": "",
        "Config": {
            "Hostname": "e5c68db50333",
            "Domainname": "",
            "User": "",
            "AttachStdin": false,
            "AttachStdout": false,
            "AttachStderr": false,
            "Tty": false,
            "OpenStdin": false,
            "StdinOnce": false,
            "Env": null,
            "Cmd": [
                "/bin/bash"
            ],
            "Image": "d8bd0657b25f17eef81a3d52b53da5bda4de0cf5cca3dcafec277634ae4b38fb",
            "Volumes": null,
            "WorkingDir": "",
            "Entrypoint": null,
            "OnBuild": null,
            "Labels": {}
        },
        "Architecture": "amd64",
        "Os": "linux",
        "Size": 125110803,
        "VirtualSize": 125110803,
        "GraphDriver": {
            "Name": "aufs",
            "Data": null
        }
    }
]

root@linuxtips:~#
Sometimes the respective dockerfile will be provided along with the image, and then it becomes much easier: just read that file to know exactly how it was created. :)
A quite interesting command that helps us understand how an image is divided into layers (and, most importantly, what was done in each layer) is "docker history".
root@linuxtips:~# docker history linuxtips/apache:1.0

IMAGE        CREATED        CREATED BY                                      SIZE         COMMENT
4862def18dfd 36 minutes ago /bin/sh -c #(nop) EXPOSE 80/tcp                 0 B
06210ac863da 36 minutes ago /bin/sh -c #(nop) VOLUME [/var/www/html/]       0 B
fed9b6bc7ad9 36 minutes ago /bin/sh -c #(nop) LABEL description=Webserver   0 B
68f6e8de3df3 36 minutes ago /bin/sh -c #(nop) ENV APACHE_LOG_DIR=/var/log   0 B
1a129e753d1e 36 minutes ago /bin/sh -c #(nop) ENV APACHE_RUN_GROUP=www-da   0 B
f0f9d7be7c70 36 minutes ago /bin/sh -c #(nop) ENV APACHE_RUN_USER=www-dat   0 B
3dafea4a403a 36 minutes ago /bin/sh -c #(nop) ENV APACHE_PID_FILE=/var/ru   0 B
f31eb176ecc8 36 minutes ago /bin/sh -c #(nop) ENV APACHE_LOCK_DIR=/var/lo   0 B
0bbefd91da05 36 minutes ago /bin/sh -c apt-get update && apt-get install    68.29 MB
f50f9524513f 12 days ago    /bin/sh -c #(nop) CMD ["/bin/bash"]             0 B
<missing>    12 days ago    /bin/sh -c #(nop) ADD file:b5393172fb513d       125.1MB

root@linuxtips:~#
Notice that the first lines of the previous command's output are related to the information we asked to add to the image in the dockerfile. The remaining layers are original from the image we got from Docker Hub through the "FROM" instruction.
There's also a website called "ImageLayers": it does exactly the same thing as "docker history", but you don't need to download the image -- and, well, it's web. ImageLayers can be accessed at: https://imagelayers.io/.
Docker Hub, as we've already mentioned, has many components, among them the one responsible for the image repository: the registry.
It's possible to use a local registry instead of one in the cloud, such as Docker Hub or other registries that are easily found on the internet. We'll discuss this in more detail later. :P
In order to use Docker Hub to manage your images, you need to create an account.
9.2. Let's create an account?
To create your account, you need to access the URL https://hub.docker.com. Previously it was possible through the "docker login" command. Today, the "docker login" command is only used to authenticate to Docker Hub after creating the account.
Once you confirm your email, you can already authenticate and start using Docker Hub.
root@linuxtips:~# docker login
Login with your Docker ID to push and pull images from Docker Hub. If you don't have a Docker ID, head over to https://hub.docker.com to create one.

Username: linuxtips01
Password:
Login Succeeded

root@linuxtips:~#
You can create public repositories freely, but on the free account you only have the right to one private repository. If you need more than one private repository, you need to upgrade your account and pay a monthly fee. :)
If you want to specify another registry instead of Docker Hub, just pass the address as a parameter, as follows:
# docker login registry.seilaqual.com
9.3. Now let's share these images on the interwebs
Once we've created our account on Docker Hub, we can start using it!
As an example, we'll use the image we built with the dockerfile in the previous chapter called "linuxtips/apache". When we upload this image to Docker Hub, the repository will have the same name as the image, i.e., "linuxtips/apache".
Something very important! Your image must follow this pattern in order to upload it to Docker Hub:
yourusername/imagename:version
Thus, we know that "linuxtips/apache:1.0" means:
-
linuxtips -- Docker Hub username.
-
apache -- Image name.
-
1.0 -- Version.
Now we'll use the "docker push" command, responsible for uploading the image from your local machine to Docker Hub's registry, as shown in the following example:
root@linuxtips:~# docker push linuxtips/apache:1.0
The push refers to a repository [docker.io/linuxtips/apache]
b3a691489ee1: Pushed
5f70bf18a086: Layer already exists
917c0fc99b35: Pushed
1.0: digest: sha256:c8626093b19a686fd260dbe0c12db79a97ddfb6a6d8e4c4f44634f66991d93d0 size: 6861

root@linuxtips:~#
By accessing the URL https://hub.docker.com/ you'll be able to view the repository you just created, as shown in the following image:
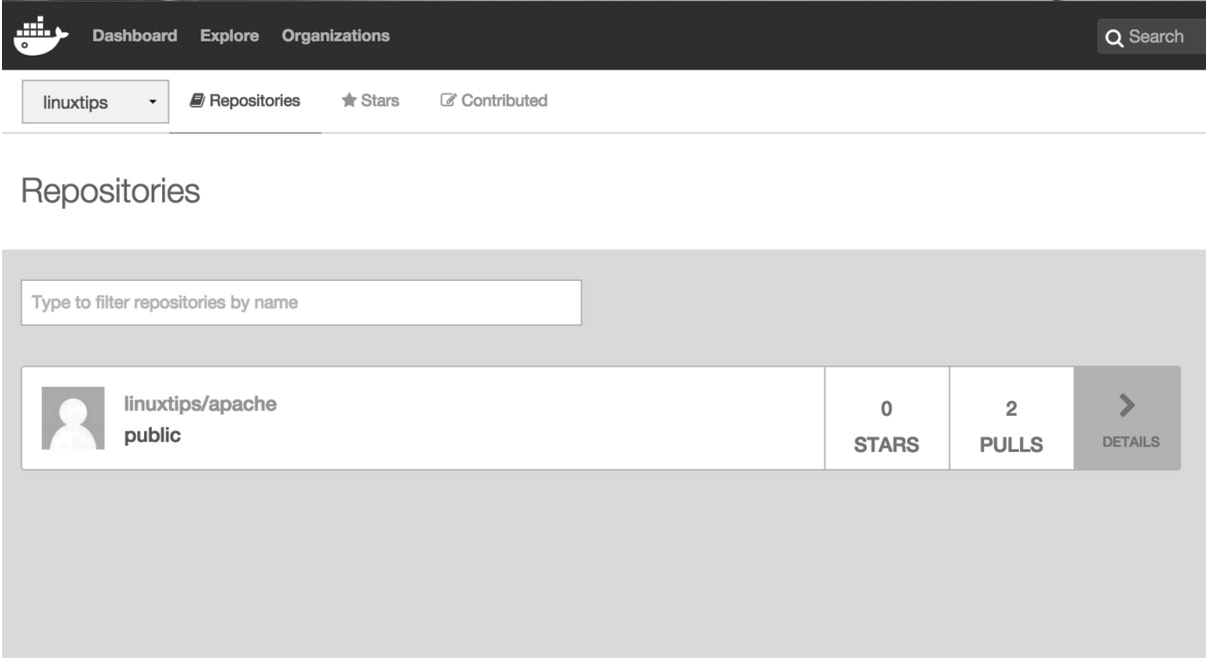
By default, it creates the repository as public. ;)
If you want to view your new repository from the command line, just use the "docker search" command followed by your Docker Hub username:
root@linuxtips:~# docker search <your_username>

NAME                DESCRIPTION      STARS            OFFICIAL       AUTOMATED
linuxtips/apache                     0
Since we have the image in Docker Hub's registry, let's test it by pulling the image and then running it to see if everything really works in such a simple and easy way. :)
First, let's stop the containers that use the "linuxtips/apache" image:
# docker container ls | grep your_username/your_image
# docker container stop CONTAINERID
It's not possible to remove an image if any container is running using it as a base image. That's why it's necessary to stop the containers as we did before.
To remove an image, you need to use the "docker image rm" command, responsible for removing images from the local disk.
It's important to mention that if you have stopped containers that use this image as a base, you need to force the image removal using the "-f" parameter:
# docker image rm -f linuxtips/apache:1.0
Untagged: linuxtips/apache:1.0
Done! We've removed the image!
Now let's pull the image directly from Docker Hub's registry so we have the image again on our local disk and can run a container using it.
root@linuxtips:~# docker pull linuxtips/apache:1.0
1.0: Pulling from linuxtips/apache
fdd5d7827f33: Already exists
a3ed95caeb02: Already exists
11b590220174: Already exists
Digest: sha256:c8626093b19a686fd260dbe0c12db79a97ddfb6a6d8e4c4f44634f66991d93d0
Status: Downloaded newer image for linuxtips/apache:1.0

root@linuxtips:~#
We can view it again using the "docker image ls" command.
root@linuxtips:~# docker image ls
REPOSITORY           TAG  IMAGE ID        CREATED             SIZE
linuxtips/apache     1.0  4862def18dfd    About an hour ago   193.4 MB

root@linuxtips:~#
To create the container using our image:
root@linuxtips:~# docker container run -d linuxtips/apache:1.0
Simple as flying, right?
9.4. I don't trust the internet; can I create my own local registry?
Since many companies don't like to keep their data in the cloud on third-party services, there's the possibility of configuring a local registry. This way, you don't need to use Docker Hub's registry, for example. This allows you to share your images with other people in your company, functioning as a Docker image repository. Awesome!
The project URL is at https://github.com/docker/distribution. Docker Distribution is a registry that serves to store and share your images. It replaces Docker Registry, which has become obsolete.
To have Docker Distribution in a simple and fully functional way, storing and distributing our Docker images locally, just run it as a container! :D
root@linuxtips:~# docker container run -d -p 5000:5000 --restart=always --name registry registry:2
Unable to find image 'registry:2' locally
2: Pulling from library/registry
fdd5d7827f33: Already exists
a3ed95caeb02: Pull complete
a79b4a92697e: Pull complete
6cbb75c7cc30: Pull complete
4831699594bc: Pull complete
Digest: sha256:20f5d95004b71fe14dbe7468eff33f18ee7fa52502423c5d107d4fb0abb05c1d
Status: Downloaded newer image for registry:2
4f8efc8a71531656dc74e99dea74da203645c0f342b0706bc74200ae0a50cb20

root@linuxtips:~#
With the previous command, we created a container named "registry" that uses the "registry:2" image as a base and we used the "--restart=always" option. If any problem occurs with the container or Docker, it will be started automatically. We also specified that the communication port with the container will be 5000, which will also use port 5000 on the host for the same purpose. We'll see about the "-p" parameter soon, in the chapter related to networking. ;)
You can verify the registry container running, as well as its image:
# docker container ls
# docker image ls
Very good, our registry is already running! Now let's test it by trying to push our image to it.
First, we'll need to add a new tag to our image specifying the new registry address instead of the username we used when we wanted to push to Docker Hub. To do this, we'll use the "docker tag" command again:
# docker tag IMAGEMID localhost:5000/apache
# docker image ls
Now just push to our local registry as follows:
root@linuxtips:~# docker push localhost:5000/apache
The push refers to a repository [localhost:5000/apache]
b3a691489ee1: Pushed
5f70bf18a086: Pushed
917c0fc99b35: Pushed
latest: digest: sha256:0e69b8d5cea67fcfedb5d7128a9fd77270461aa5852e6fe9b465565ec8e4e12f size: 925

root@linuxtips:~#
Done! Now we have a local registry!
We've created a fully functional registry, but a simple one. If you want to use features like user control, certificates, other storage options, etc., visit the project page on GitHub: https://github.com/docker/distribution.