Cluster Update Process
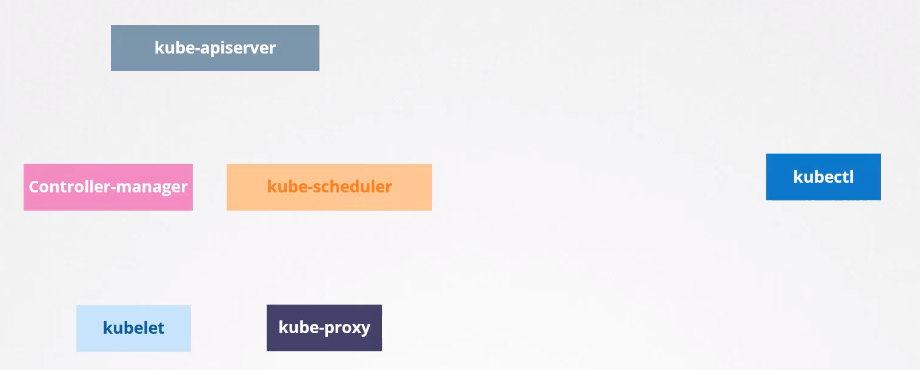
We know that Kubernetes is a tangle of projects. Let's focus only on these for now.
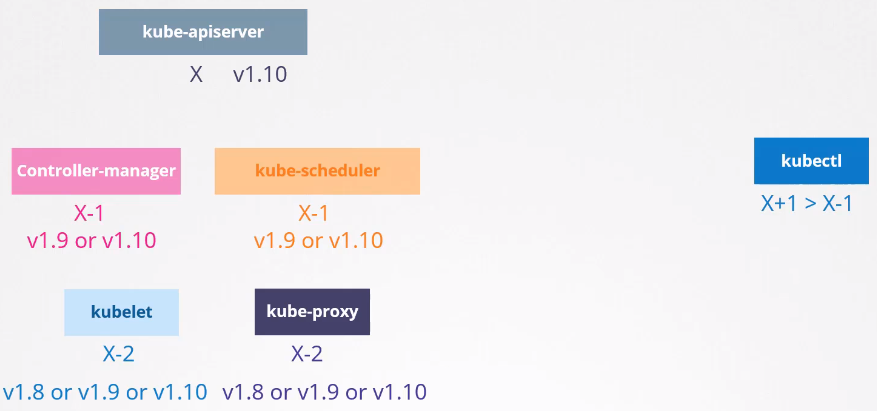
It's not mandatory that all components are at the same version, but since everyone communicates with kube-apiserver, no one can be at a version above it.
We have the exception of kubectl being able to be 1 higher or 1 lower to give commands to the cluster. The rule for this distortion is as follows considering the minor version.
This allows us to update components separately, one at a time.
Now let's go to the recommendations for a cluster upgrade taking into account the rule we have above. We cannot have a distortion greater than 2 between kube-apiserver and kubelet and kube-proxy.
Let's imagine we're on version 1.10 and version 1.11 and 1.12 were released. It would be ok to upgrade the master components with this difference of 2 for the worker nodes that contain kubelet and kube-proxy.
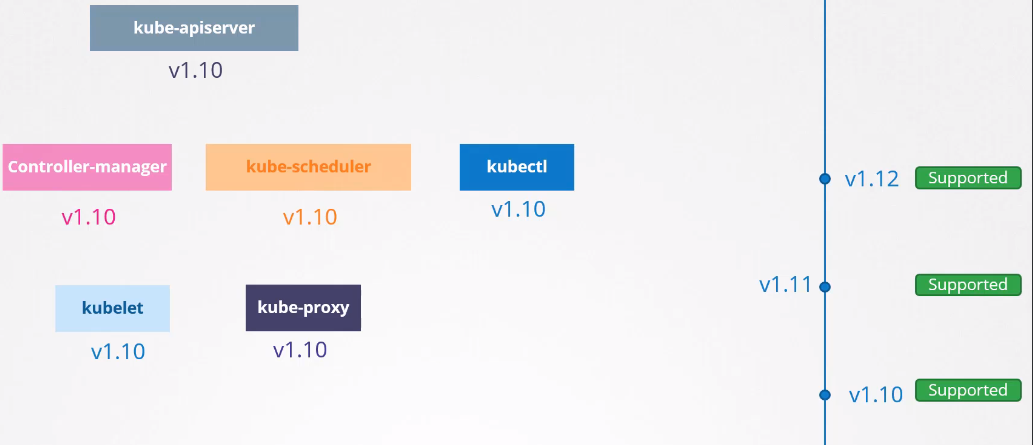
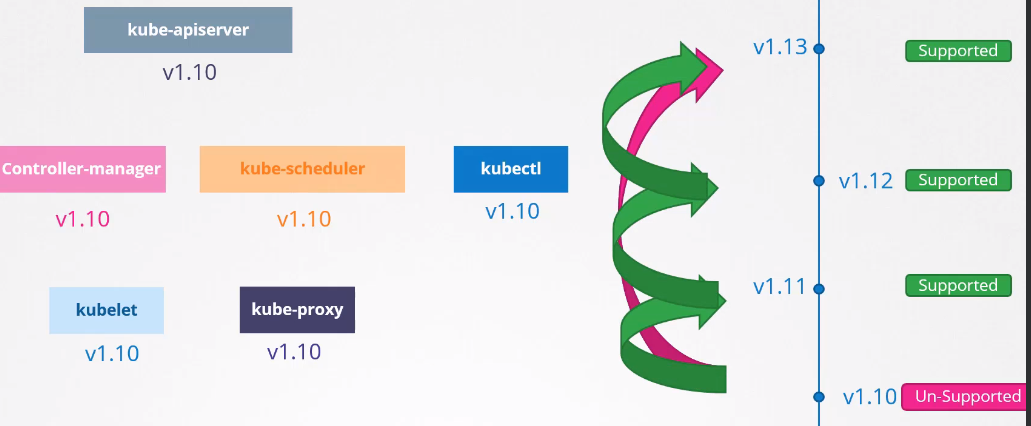
If version 1.13 were released it would no longer be possible. The best time to upgrade a cluster is before the next unsupported version.
To avoid upgrading all the time, it's interesting to wait for this difference of 2, but never 3.
The ideal and recommended is to do the upgrade 1 by 1.
The upgrade process depends a lot on how the cluster was built.
-
In clouds, usually with a few clicks we can upgrade an entire cluster, as they give us this facility.
-
If a cluster was built using kubeadm we can use kubeadm itself to do the upgrade.
-
If the cluster was built from scratch it needs to be done manually.
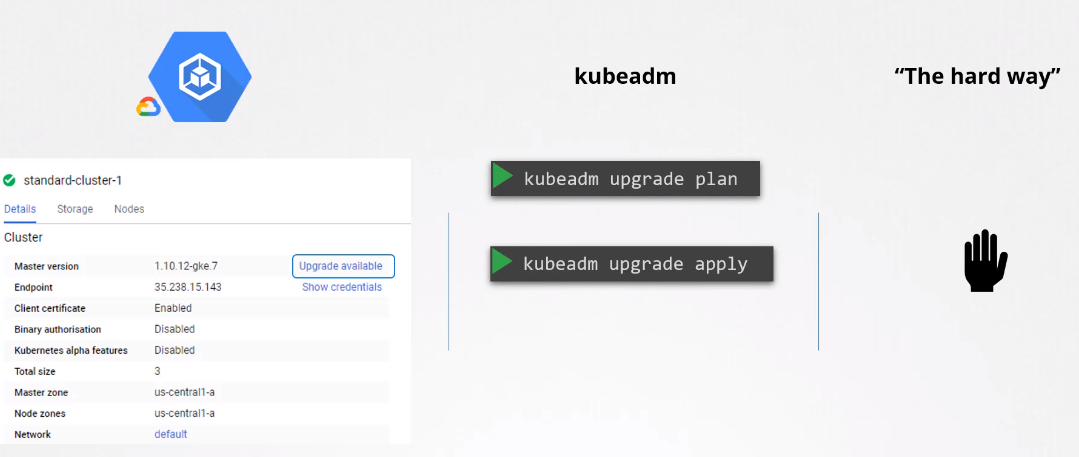
Kubeadm Update
Two steps are necessary to update a cluster.
-
First update ALL masters- While masters are undergoing updates it's not possible to create, delete and modify anything in the cluster, but what already exists works normally as long as the nodes don't go down.
- If something stops, for example a pod dies, it won't be recreated because the controllers are being updated.
- It's not possible to access the cluster using kubectl because kube-apiserver will be undergoing update as well.
- When the master nodes come back everything should work normally.
- Remembering that it should be at most 2 versions above kubelet and kube-proxy running on workers.
-
Second update the nodes- All in once strategy (all at once)
- If you're going to upgrade all workers at once, all cluster applications will be inoperative.
- When nodes are ready new applications will be scheduled to the nodes and everything should work normally again.
- One node at a time strategy (One by one)
- We use the strategy of draining one node at a time and updating that node.
- Add new nodes with newer versions
- This case is one of the best scenarios especially if the cluster is in a cloud rather than an on-premises environment.
- Once new nodes are added, we can start eliminating old nodes since pods will be automatically relocated to the new nodes (with available resources).
- Good time for operating system upgrade.
- All in once strategy (all at once)
A very important detail; the version shown below is the version of Kubelet inside each of the nodes.
Depending on the type of installation, if Kubelet is not available on the master, it wouldn't even appear here. That is, the get nodes command only brings nodes with Kubelet installed.
kubectl get nodes
NAME                       STATUS   ROLES                  AGE     VERSION
k3d-k3s-default-agent-1    Ready    <none>                 2d13h   v1.27.4+k3s1
k3d-k3s-default-agent-0    Ready    <none>                 2d13h   v1.27.4+k3s1
k3d-k3s-default-server-0   Ready    control-plane,master   2d13h   v1.27.4+k3s1
The kubeadm command does not update Kubelet
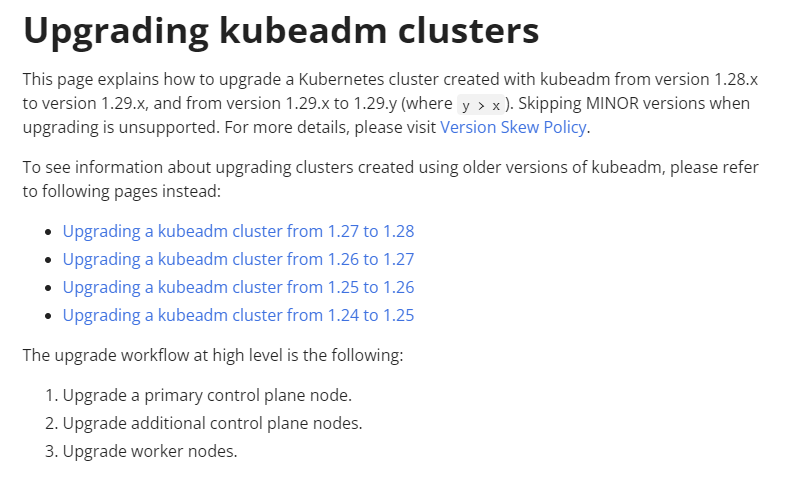
On the master node you can run the command to see which upgrades are possible. Even if it's possible to do two upgrades forward you should do one at a time.
Kubeadm maintains equal versions of Kubernetes components so upgrade it to the version you will install.
It's always good to follow the documentation https://kubernetes.io/docs/tasks/administer-cluster/kubeadm/kubeadm-upgrade/
But here's a brief summary.
Just observing this we can see it's always good to go one by one in the minor.
Update the repository to the version you want to update.
# In this example we have version 1.28, but if you were to do it for 1.29 edit the file below.
nano /etc/apt/sources.list.d/kubernetes.list
deb [signed-by=/etc/apt/keyrings/kubernetes-apt-keyring.gpg] https://pkgs.k8s.io/core:/stable:/v1.28/deb/ /

sudo apt update
sudo apt-cache madison kubeadm
sudo apt-get install kubeadm

sudo apt-mark unhold kubeadm && \
sudo apt-get update && sudo apt-get install -y kubeadm='1.28.x-*' && \
sudo apt-mark hold kubeadm

kubeadm version
# Usually on masters there are no pods running which is good practice but if there are you need to drain.
kubectl drain <node_name_master> --ignore-daemonsets

# Update the repo
apt-get update

# Usually these packages are marked not to be updated
apt-mark unhold kubeadm
apt-get upgrade -y kubeadm=1.XX+1.0-00
#apt-get upgrade -y kubeadm=1.XX+1.0-00 --allow-downgrade
apt-mark hold kubeadm # Mark again
# Kubeadm also updates kubectl, but it's always good to check

# Now you can run plan again to see how far you can go with the new kubeadm
kubeadm upgrade plan
# Now with the correct kubeadm version
kubeadm upgrade apply v1.XX.Y

# If it's other control planes instead of the first just update
kubeadm upgrade node

# If the master has kubelet, it's necessary to update it as well
apt-mark unhold kubelet
apt-get upgrade -y kubelet=1.XX+1.0-00 --allow-downgrades
apt-mark hold kubelet

systemctl daemon-reload
systemctl restart kubelet

# If you had to drain
kubectl uncordon <node_name_master>
Now each of the worker nodes (one by one).
kubectl drain nodeX --ignore-daemonsets # Drain the pods
cat /etc/*release*  # will show you which distro it is (If different from ubuntu)

# Also need to upgrade kubeadm
apt-mark unhold kubeadm
apt-get upgrade -y kubeadm=1.XX+1.0-00
apt-mark hold kubeadm

sudo kubeadm upgrade node # But need to call after to update with the masters

# Now let's do kubectl and kubelet
apt-mark unhold kubelet kubectl
apt-get upgrade -y kubelet=1.XX+1.0-00 kubectl=1.XX+1.0-00 # inside the node update kubelet
apt-mark hold kubelet kubectl

systemctl daemon-reload
systemctl restart kubelet # to restart the service with the new binary

kubectl uncordon nodeX # free the node for scheduling
All this should be done again after we make a cluster from scratch also using kubeadm.
It's good to do tests with more than one master.