Base Project
It's time to move on to a complete pipeline and for that we'll need code where we can apply the various steps of a pipeline. We'll start with CI initially and CD we can implement at the end using GitOps.
Fork this repository to your account and let's begin. Remember, this code is not mine, but we can apply pipelines in practice and use gitlab-ci resources. Remember to fork into the group that has the runner you created if you want to use it, otherwise it will use GitLab's shared runners.
When cloning this repository we can observe that it's a project made in Node.js, meaning to run we'll need Node.js.
 ~/Desktop/gitlab
❯ git clone [email protected]:puziol/learn-gitlab-app.git
❯ cd learn-gitlab-app
# What we have in the project
❯ tree -L 1
.
├── e2e
├── eslint.config.js
├── index.html
├── node_modules
├── package-lock.json
├── package.json
├── playwright.config.cjs
├── public
├── README.md
├── src
├── tests
└── vite.config.js
Let's make a modification so everything is installed automatically and easily.
Install DevBox and understand how it works, it's important as I believe it will change your life from now on.
Since it's a nodejs project, we need to install Node to run. This is the first thing we should know, as in a pipeline we'll need in the build process to provide the environment that can build this code.
- Install dependencies: We'll need npm for package management and this comes with nodejs installation.
- Build the project
- Test
In the project folder let's install and initialize devbox.
# Initializing the project with devbox
❯ devbox init
# Adding nodejs in the version we want
❯ devbox add [email protected]
# When we start the project within a specific environment we'll have everything we need without installing anything on the machine. We can also leverage this for the pipeline in the future.
❯ devbox shell
❯ node --version
v23.11.0
❯ npm --version
10.9.2
You'll observe that a .devbox folder will appear so it's good to put it in git-ignore to not upload to the repository and also devbox.lock
❯ echo ".devbox" >> .gitignore
❯ echo "devbox.lock" >> .gitignore
Now that we're already in an isolated environment, we can install dependencies before building the project and for that we can do.
❯ npm install

added 371 packages, and audited 372 packages in 3s

123 packages are looking for funding
  run `npm fund` for details

6 vulnerabilities (4 moderate, 2 critical)

To address all issues, run:
  npm audit fix

Run `npm audit` for details.
Here we already have an important point for the pipeline we're going to build, checking package vulnerabilities.
Let's fix this by updating the packages.
❯ npm update

added 11 packages, removed 2 packages, changed 85 packages, and audited 380 packages in 17s

130 packages are looking for funding
  run `npm fund` for details

6 moderate severity vulnerabilities

To address all issues (including breaking changes), run:
  npm audit fix --force

Run `npm audit` for details.

####
❯ npm audit fix --force
npm warn using --force Recommended protections disabled.
npm warn audit Updating vitest to 3.1.2, which is a SemVer major change.
npm warn audit Updating @vitest/ui to 3.1.2, which is a SemVer major change.

added 3 packages, removed 7 packages, changed 11 packages, and audited 376 packages in 2s

129 packages are looking for funding
  run `npm fund` for details

found 0 vulnerabilities
Done, now we have no vulnerabilities and we have the node_modules folder with the necessary dependencies (packages). Now we can build the project.
❯ npm run build

> [email protected] build
> vite build

vite v6.3.2 building for production...
✓ 31 modules transformed.
build/index.html                   0.47 kB │ gzip:  0.30 kB
build/assets/react-CHdo91hT.svg    4.13 kB │ gzip:  2.14 kB
build/assets/index-n_ryQ3BS.css    1.39 kB │ gzip:  0.72 kB
build/assets/index-BcKvuBhg.js   147.40 kB │ gzip: 47.58 kB
✓ built in 338ms
And we have the build folder which will also be ignored by .gitignore when uploading the code. This is what we need to have in the build process, our build folder.
Let's add the serve package to run the project and check?
❯ npm install serve
❯ npx serve ./build

   ┌────────────────────────────────────────┐
   │                                        │
   │   Serving!                             │
   │                                        │
   │   - Local:    http://localhost:3000    │
   │   - Network:  http://10.0.0.26:3000    │
   │                                        │
   │   Copied local address to clipboard!   │
   │                                        │
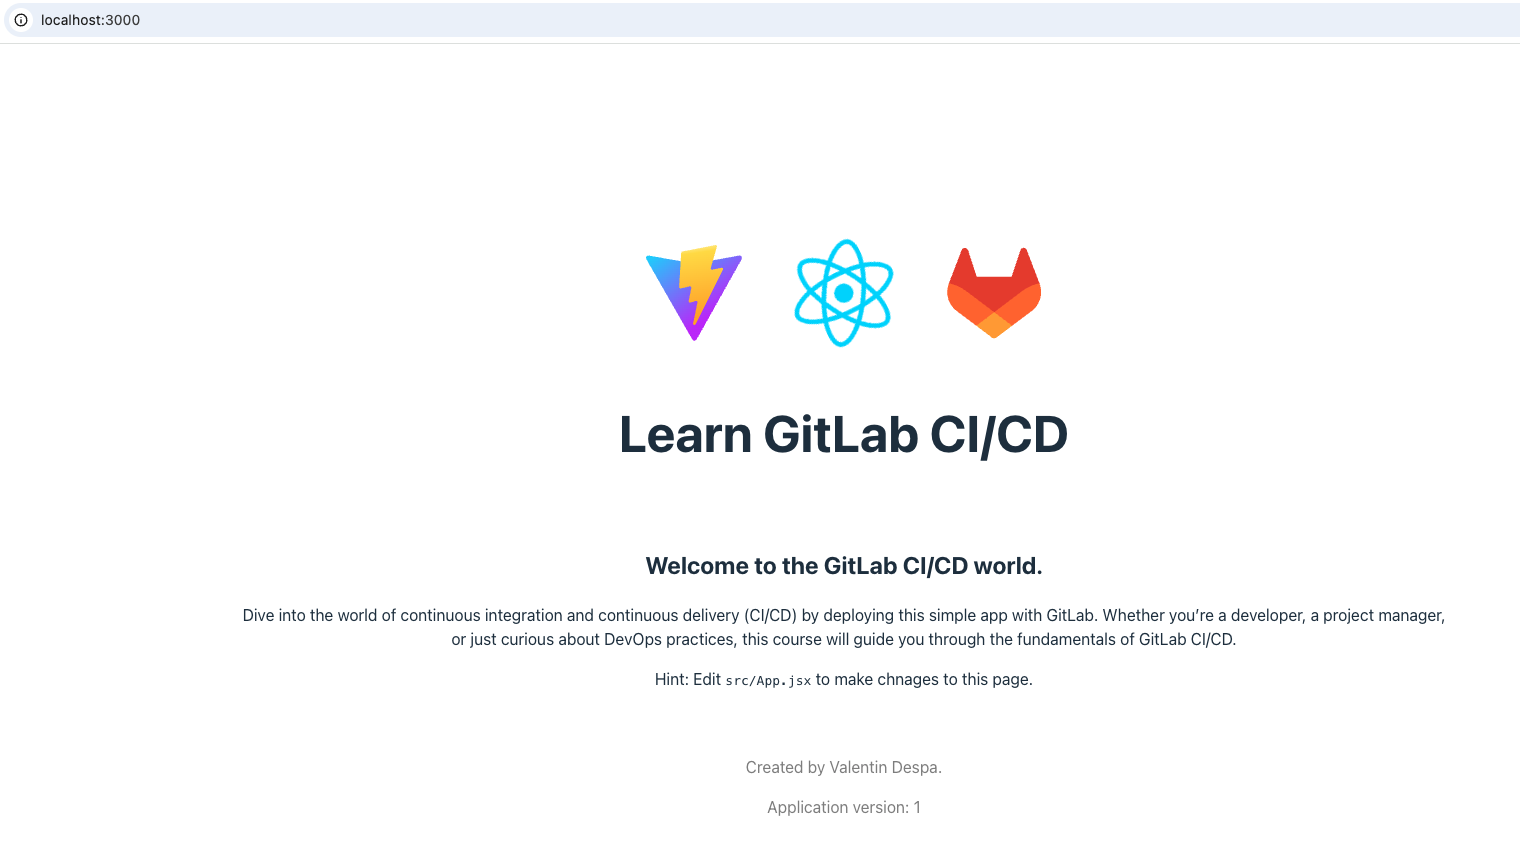
And we have the project running in the browser.
Two important points to leverage devbox. The npm install could be part of the initialization when devbox starts up, what do you think?
Let's edit the devbox file so when it initializes it already does npm install if the package.json file exists. We can remove the test as we won't use it now.
{
  "$schema": "https://raw.githubusercontent.com/jetify-com/devbox/0.14.2/.schema/devbox.schema.json",
  "packages": ["[email protected]"],
  "shell": {
    "init_hook": [
      "if [ -f package.json ]; then npm install; fi"
    ]
  }
}
The ready code is in the devbox branch.
I want to make it clear that we could install node on the machine and we wouldn't need devbox, but the cleanliness and ease we can have in the future with pipelines using devbox is from another world, we'll see ahead.
Not for this study, but the pipeline could start locally! In fact, many errors we'll have with the pipeline in the future could be solved locally before uploading the code. Check a bit about pre-commit but don't implement for this study.
Now talking a bit about the pipeline, the runner has to be ready to execute this project and we have 3 options.
1 - Install node as soon as the runner starts. If we're going to start from the "debian:bullseye-slim" image, know that it doesn't have nodejs so it would be necessary to install through the apt package manager of this image. 2 - Use the same process we did locally to run, i.e., install devbox and let it prepare the complete environment. It would be the same as item 1, however we would use fewer commands. 3 - Use a docker image that already comes with node installed instead of "debian:bullseye-slim".
The entire installation process takes time until the runner is ready to do what needs to be done. Each job will execute this entire process, to prepare the runner so it has the capacity to do what it needs.
The best way to do this is to use item 3, running an image that we already have what we need, however we don't always have everything we need in an image and sometimes an image is so specific and to keep it small everything is removed. For example, a node image may not have the package manager installed to install a Curl if we need it.
The best way is to create an image with everything we need, but for that you need knowledge in Docker. If you don't have this expertise you should, as today it's the basis for DevOps and development.
Tips
When creating a project we can define some things in Settings. We can do this at group level too for the entire organization. What's good to do?
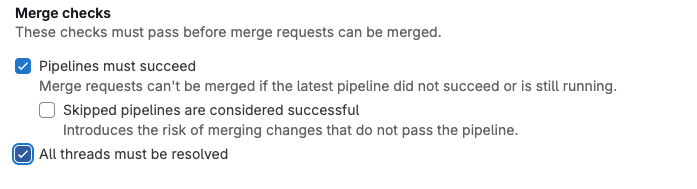
In Settings > Merge request we have some options.
What type of merge method?
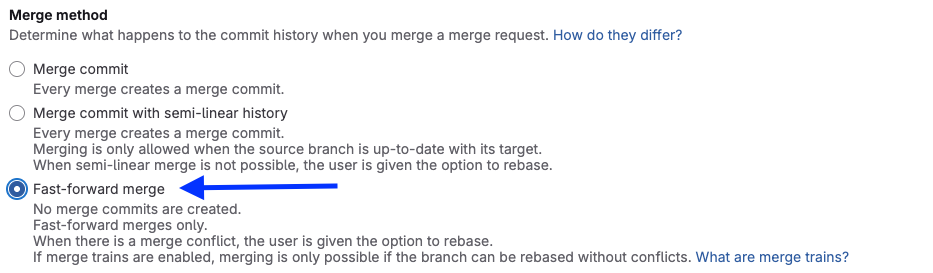
The above option doesn't create a commit for the merge request keeping the history cleaner.
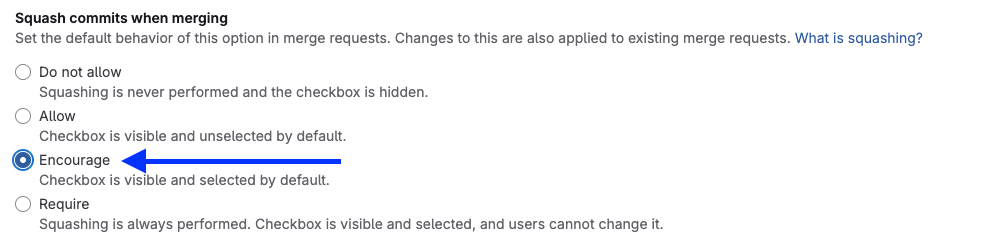
Squashing commits is useful when pushing. If you made several modifications in the branch, instead of merging all changes individually made in your branch, it will create a single commit in the destination branch. It's much better to read the history.
It's interesting whenever the pipeline is successful and all review markings have been corrected.
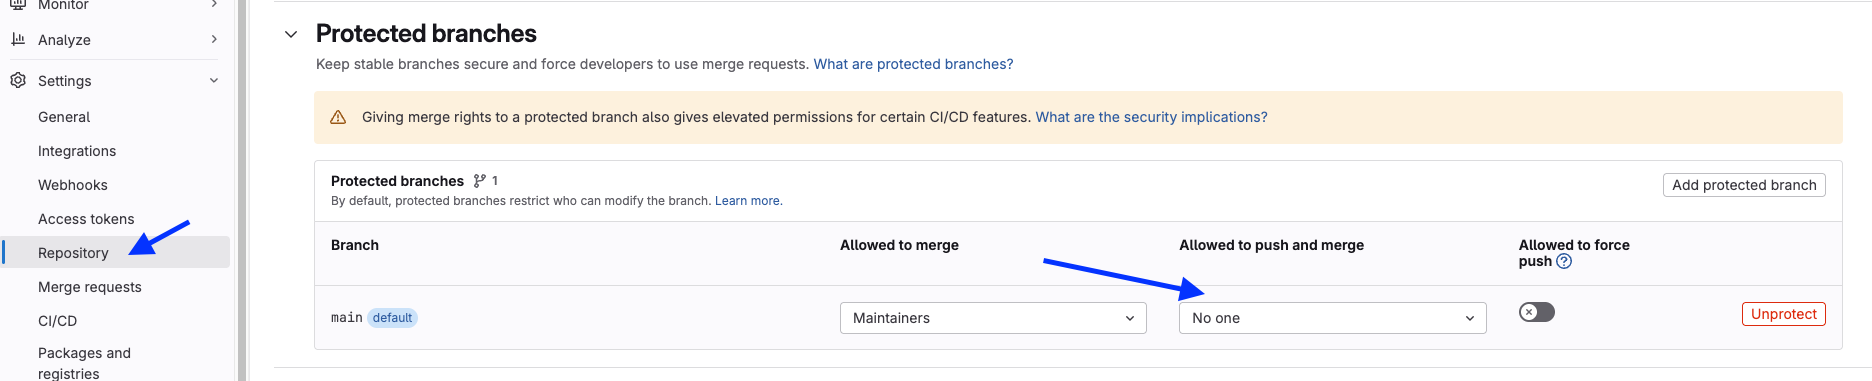
Another thing we can do is create protected branches, so no one can make a direct push to a branch like main, requiring a merge request and forcing pipeline execution. The main branch is already protected, but people can push directly to it. We can eliminate this.