Deploy
Where could we deploy this project to run? It's impossible to list all the methods we could use to make this project available.
We've already built the image, now we just need to take it and deploy it to the right place in the last stage (deploy) of the pipeline.
To do this using two different methods, we'll do the following:
- In develop (develop branch) we'll host our code on Netlify.
- In production (main branch) we'll deploy a container to Kubernetes.
For Netlify, we can use the netlify-cli to interact with the tool. If you look closely at the documentation, you'll find the entire installation process, and we'll use it in the deploy job.
If you don't have one, create an account and add a new project MANUALLY. Upload the build/ folder from the project just to generate a new site. If you don't have the build folder, just run the same commands from the build job (npm run build) and the folder will appear, or grab a build from some pipeline artifact.
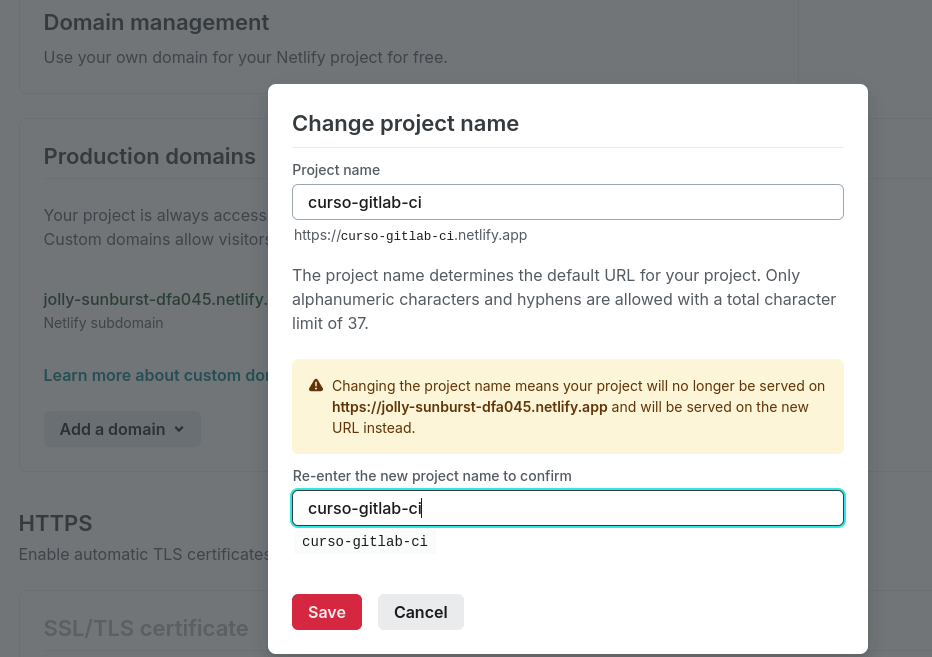
When creating the project, edit the name so the URL generated by Netlify is more user-friendly. Netlify uses the project name to create the link with the .netlify.app domain. In my case, I changed it to curso-gitlab-ci.
Here we already have the manually deployed site. What interests us in generating this project is having some information so we can log in with the netlify-cli tool.
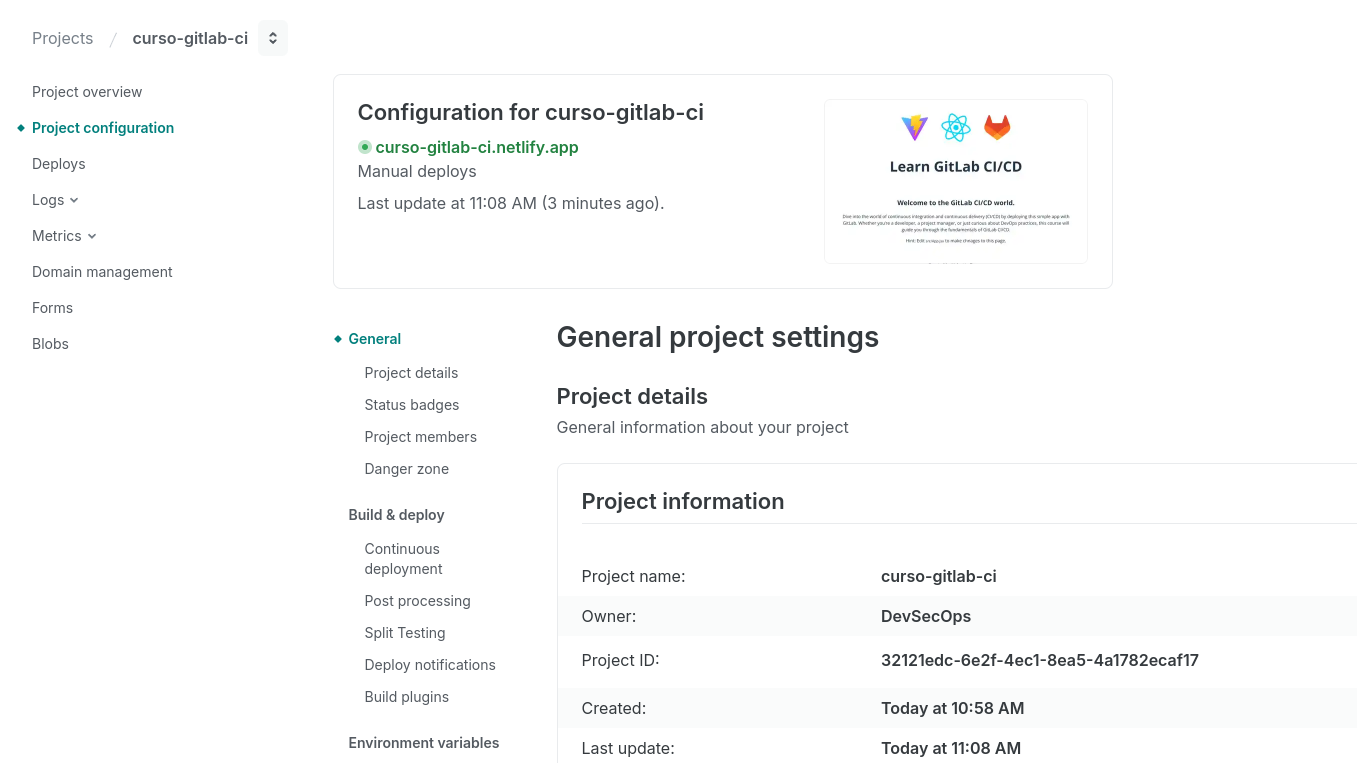
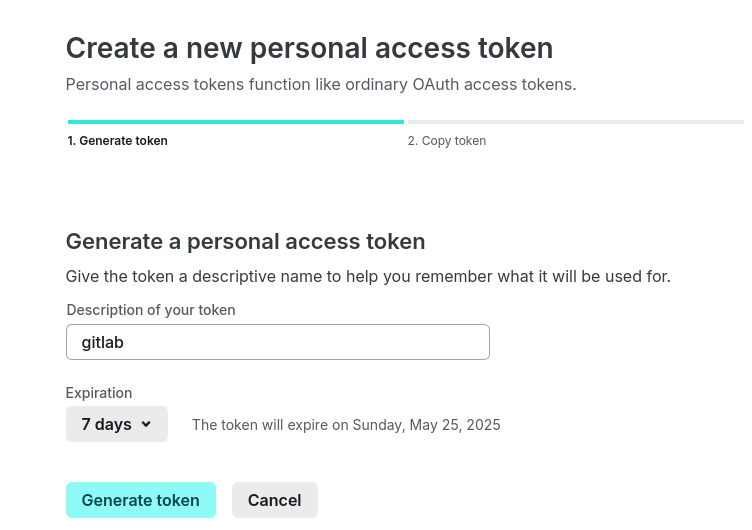
We need the Project ID, which we can get in the project settings, and a token. In your account at https://app.netlify.com/user/applications#content, generate a token and set the expiration time according to your needs.
Let's create the variables in the repository for the develop environment. The netlify-cli will look for the environment variables NETLIFY_AUTH_TOKEN and NETLIFY_SITE_ID for the netlify status command.

We haven't defined anything in production yet, only development will deploy this way using netlify.
I'll make a small change to the code just to see some difference.
      <p className="read-the-docs">
        Created by Valentin Despa and modified by David Puziol.
      </p>
Our deploy job will look like this:
deploy-dev:
  stage: deploy
  needs: [build] # We depend on build as it will generate the build directory
  environment: # The develop variables will be available in this job
    name: develop
  variables:
    GIT_STRATEGY: none  # We don't need to clone the repository. Are we going to use the code for anything?
  cache:
    key: netlify-cli-cache
    paths:
      - ~/.npm  # Global npm cache
  before_script:
    - echo "Installing netlify-cli"
    - npm install -g netlify-[email protected] # Always good to pin the version
    - netlify --version
    - apk add curl
  script: | # Everything below is considered a single list item. We could have made multiple items. I did it this way to show how it looks in the log.
    echo "Checking status using credentials defined in environment variable."
    echo $NETFLIFY_AUTH_TOKEN
    echo $NETLIFY_SITE_ID
    netlify status
    echo "Uploading build directory to project $NETLIFY_SITE_ID"
    netlify deploy --prod --dir build
    curl 'https://curso-gitlab-ci.netflify.app'
  rules:
    - if: '$CI_COMMIT_BRANCH == "develop"'  # We'll do this type of deploy only in develop
The job image above is the same one used in default (node:22-alpine) and we're not using extends for anything. We don't even need this runner to have the repository code, just the artifact with the build/ folder. Setting the GIT_STRATEGY to none already gives us some performance improvement.
Another detail is that when we pass --prod to the netlify command, we'll change the public site. Since here we're doing deploys of develop on one tool and production on another, we won't worry about this.
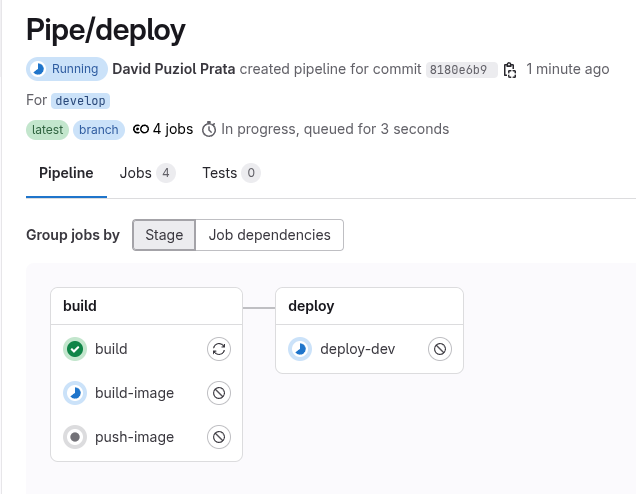
Let's create a merge with the modifications and accept it. The deploy in dev will run along with the image creation, as we're not using the image despite it being generated in the pipeline. The only dependency we've set is the build process and not the image one.
If you used the cache correctly, even if we changed the code, we didn't change the dependencies, so it should be used in the build job. It just won't be if the build hasn't been run at least once before for this job.
The curl at the end is just to see if the site is responding and nothing more. We can't guarantee changes to an entire project just by analyzing the first page.
There are pipeline stages that we call smoke tests that serve to verify changes.
The pipeline is built according to the strategy. The strategy here was that development and production are in separate branches, but it's possible to have only the main branch and put different jobs to continue deploying to other environments (Deploy dev >>>> deploy prod). Generally, when this strategy is set up, the job that deploys to production is usually set to MANUAL, meaning it will only execute if someone presses play.
For production, we'll deploy to Kubernetes to show a GitLab feature. Some details before starting. If you're taking this course and don't have a local Kubernetes cluster to play with, I recommend using kind. If you don't have Docker either, then know that kind depends on Docker.
Quick script to install the tools on Ubuntu:
# Install Docker and enable it so you don't need to use sudo
curl -fsSL https://get.docker.com | sudo sh && sudo usermod -aG docker $USER && newgrp docker
# Install Kind
curl -Lo ./kind https://kind.sigs.k8s.io/dl/v0.22.0/kind-linux-amd64 && chmod +x ./kind && sudo mv ./kind /usr/local/bin/kind
# Create the cluster with only one master node to save resources
kind create cluster

# Install kubectl to access the cluster
curl -LO "https://dl.k8s.io/release/$(curl -s https://dl.k8s.io/release/stable.txt)/bin/linux/amd64/kubectl" \
  && chmod +x kubectl \
  && sudo mv kubectl /usr/local/bin/kubectl

# Test if kubectl is communicating
kubectl get nodes

# Installing helm which we'll need
curl https://raw.githubusercontent.com/helm/helm/main/scripts/get-helm-3 | bash
- The cluster I'm going to deploy to doesn't have the kube-api exposed and doesn't have a load balancer.
- It's a local cluster on my personal machine.
- The image tag will always be latest and we're not focusing on generating different tags here.
- We're not going to create Kubernetes manifests, just apply directly which is not very correct to do.
- We'll install the GitLab Kubernetes Agent in the cluster. If the Kubernetes API is not exposed, then GitLab CI cannot access the cluster directly with kubeconfig, but the agent inside the cluster can and it's more secure. If you're not going to use GitOps, this is one of the best ways to do it.
Installing GitLab K8S Agent
On the project page, in Operate >>> Kubernetes clusters, we can connect GitLab to a cluster.
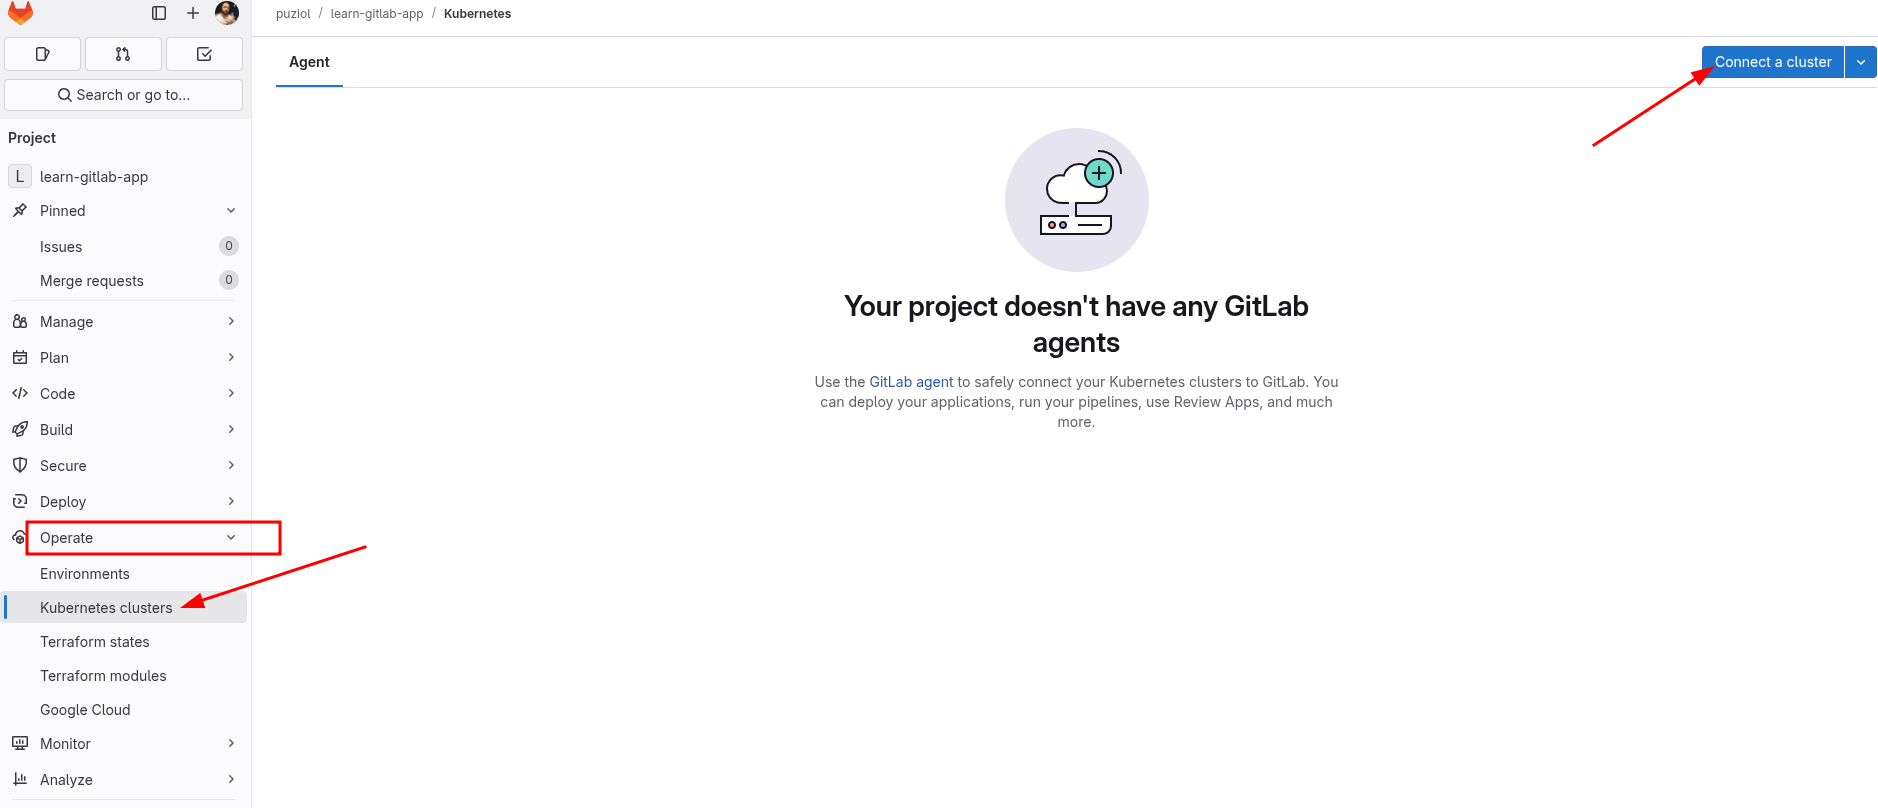
Let's create a gitlab-agent here for our cluster. I'll call it localcluster. This cluster will only be used for our main branch simulating our production environment.
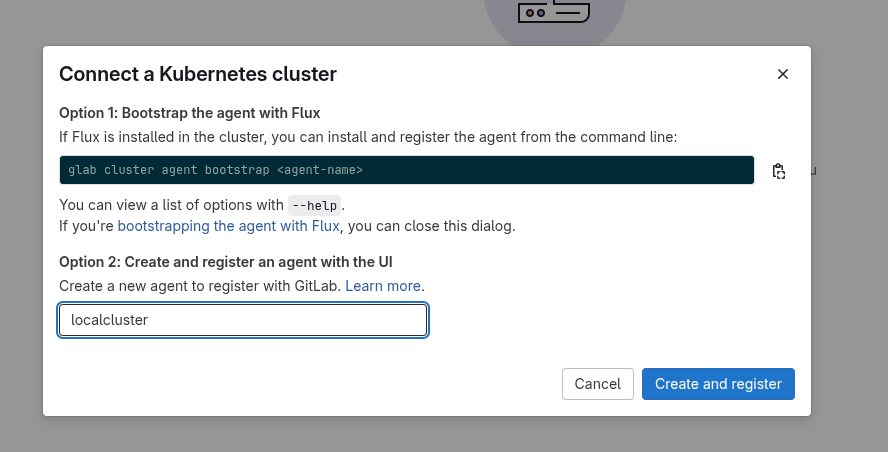
It will give us a command to execute to install the agent in the cluster via helm, including the pre-filled token.
helm repo add gitlab https://charts.gitlab.io
helm repo update
helm upgrade --install localcluster gitlab/gitlab-agent \
    --namespace gitlab-agent-localcluster \
    --create-namespace \
    --set config.token=glagent-tnRaoRCrXxkK726CDB7zX-XXXXXXXXXXXXXXXXXXXXXX \
    --set config.kasAddress=wss://kas.gitlab.com
Checking what pods we have in the cluster in the namespace:
❯ k get pods -n gitlab-agent-localcluster
NAME                                            READY   STATUS    RESTARTS   AGE
localcluster-gitlab-agent-v2-676cb8cfb9-mjpwn   1/1     Running   0          3m39s
localcluster-gitlab-agent-v2-676cb8cfb9-ntv4t   1/1     Running   0          3m39s
Now let's create the job in cicd/deploy/deploy.yaml to execute a deploy to this cluster when it reaches main.
deploy-prod:
  stage: deploy
  when: manual # I set this just to enhance the concepts, but everything could be automated
  variables:
    GIT_STRATEGY: none # We won't need the code so we'll gain speed
    KUBE_CONTEXT: puziol/learn-gitlab-app:localcluster # We create this variable that could be set within a production environment
  image:
    name: bitnami/kubectl:latest
    entrypoint: [""]
  script:
    - |
      echo "Creating deployment with image davidpuziol/learn-gitlab-app:latest"
      kubectl config get-contexts
      kubectl config use-context $KUBE_CONTEXT

      kubectl apply -f - <<EOF
      apiVersion: apps/v1
      kind: Deployment
      metadata:
        name: learn-app-deployment
        namespace: default
      spec:
        replicas: 1
        selector:
          matchLabels:
            app: learn-app
        template:
          metadata:
            labels:
              app: learn-app
          spec:
            containers:
            - name: learn-app
              image: davidpuziol/learn-gitlab-app:latest
              imagePullPolicy: Always
              ports:
              - containerPort: 3000
      EOF

      echo "Creating service to expose the application on port 3000"
      kubectl apply -f - <<EOF
      apiVersion: v1
      kind: Service
      metadata:
        name: learn-app-service
        namespace: default
      spec:
        selector:
          app: learn-app
        ports:
          - protocol: TCP
            port: 3000
            targetPort: 3000
        type: ClusterIP
      EOF
  rules:
    - if: '$CI_COMMIT_BRANCH == "main"'
If this code were in the repository:
deploy-prod:
  stage: deploy
  when: manual
    ## GIT_STRATEGY: none # We would need to clone
    KUBE_CONTEXT: puziol/learn-gitlab-app:localcluster
  image:
    name: bitnami/kubectl:latest
    entrypoint: [""]
  script:
    - |
      echo "Creating deployment with image davidpuziol/learn-gitlab-app:latest"
      kubectl config get-contexts
      kubectl config use-context $KUBE_CONTEXT

      kubectl apply k8s/deployment.yaml
      kubectl apply k8s/service.yaml

  rules:
    - if: '$CI_COMMIT_BRANCH == "main"'
For it to work, it's necessary to create a merge request to main. This same repository could connect to multiple clusters and that's why we need to specify which context kubectl should use by passing group/project/connection_name.
Another important point is that the deploy stage will come after the build stage and since the last job of the build stage will do the push, we'll need to wait for the entire build process to happen and using needs to gain speed is not possible.
When accepting the merge from develop to main, we then have deploy-prod in manual waiting.

Pressing play, we'll deploy to Kubernetes.