First Pipeline
Let's create our first pipeline, but first let's make the following configuration. Edit the runner you configured earlier and uncheck the untagged jobs option. If you're following the study, keep the same tags as it will be important later.
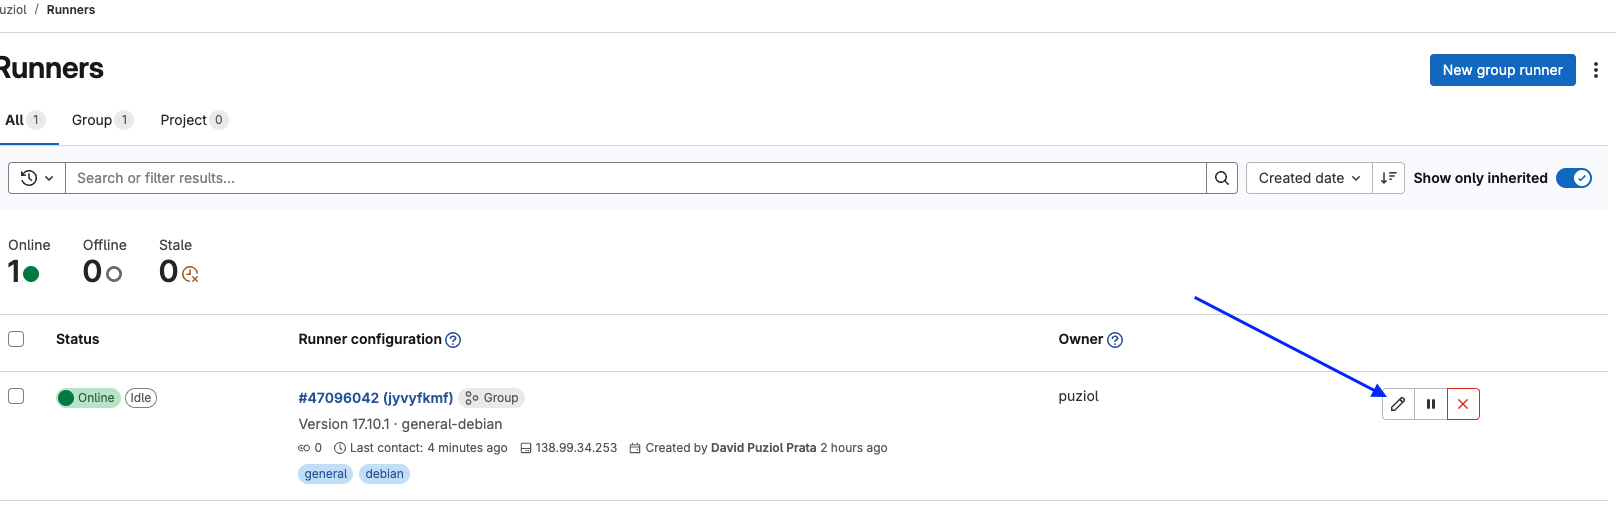
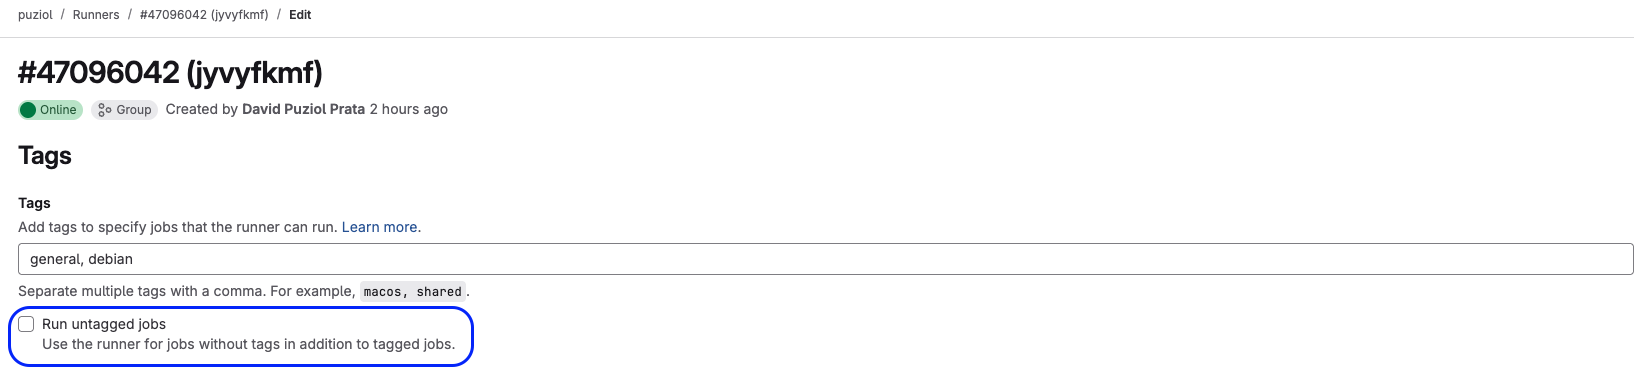
The untagged jobs option means that only jobs that have the general or debian tags will use the runner we created earlier. If the tag is not passed, shared runners will be used. Let's do this experiment.
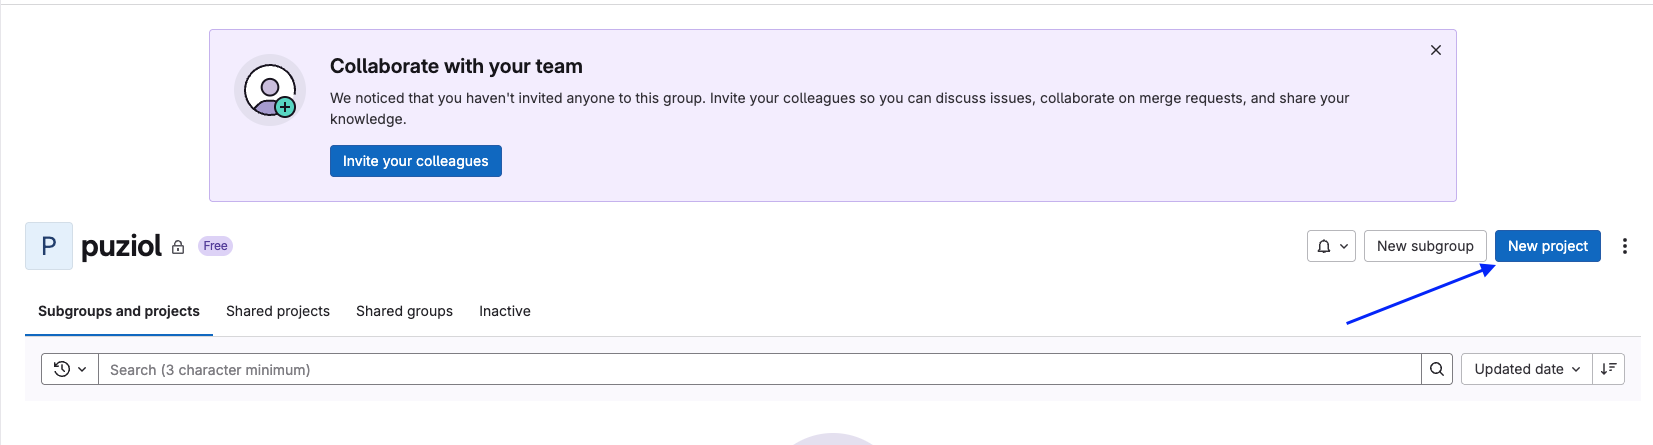
Creating a project within the group. Use the blank project.

Clone your repository and let's create an empty .gitlab-ci.yml.
❯ git clone [email protected]:puziol/first-pipeline.git

Cloning into 'first-pipeline'...
remote: Enumerating objects: 3, done.
remote: Counting objects: 100% (3/3), done.
remote: Compressing objects: 100% (2/2), done.
remote: Total 3 (delta 0), reused 0 (delta 0), pack-reused 0 (from 0)
Receiving objects: 100% (3/3), done.

❯ cd first-pipeline

❯ ls
README.md

touch .gitlab-ci.yml
Attention:
gitlab-ci.yml or .gitlab-ci.yaml are not accepted. IT MUST BE .gitlab-ci.yml and must be at the project root.
Work in VSCode or your favorite IDE. What interests us is just talking about .gitlab-ci.yml for now. It's not yet time to understand what is what but rather to understand who will execute.
#.gitlab-ci.yml
test:
  script: "echo Hello World"
Save and add everything to the default branch, upload the code and let's see what happens.
❯ git add .gitlab-ci.yml

❯ git cm "add gitlab-ci"
[main bae0760] add gitlab-ci
 1 file changed, 0 insertions(+), 0 deletions(-)
 create mode 100644 .gitlab-ci.yml

❯ git push origin main
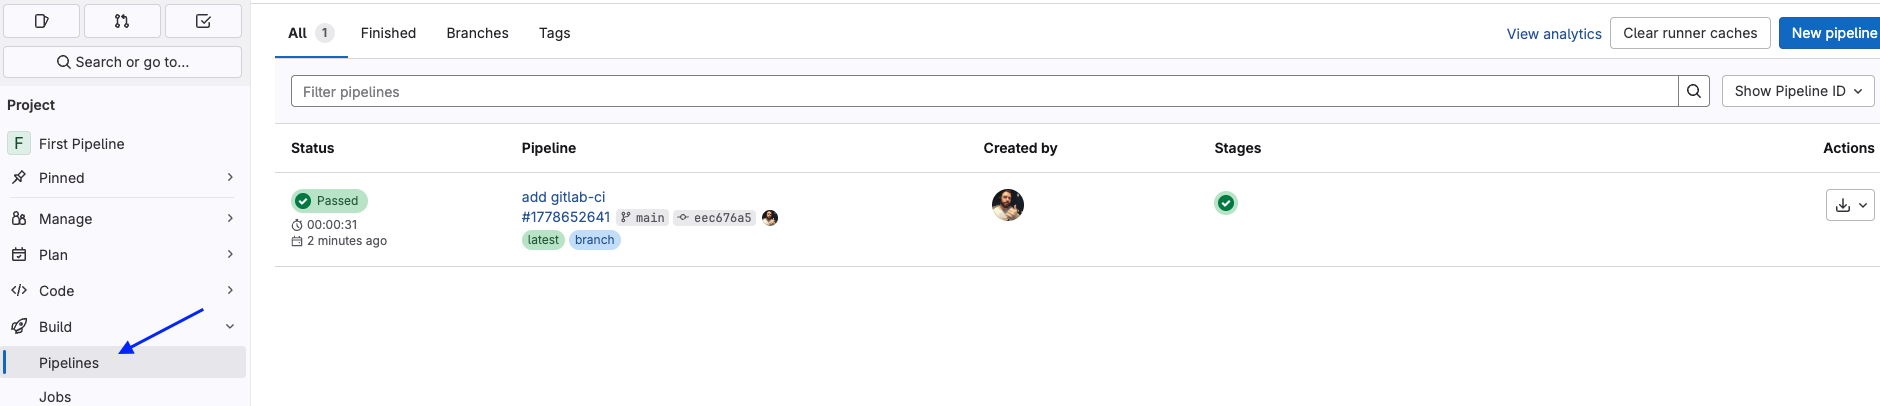
Checking the repository we have the pipeline running.
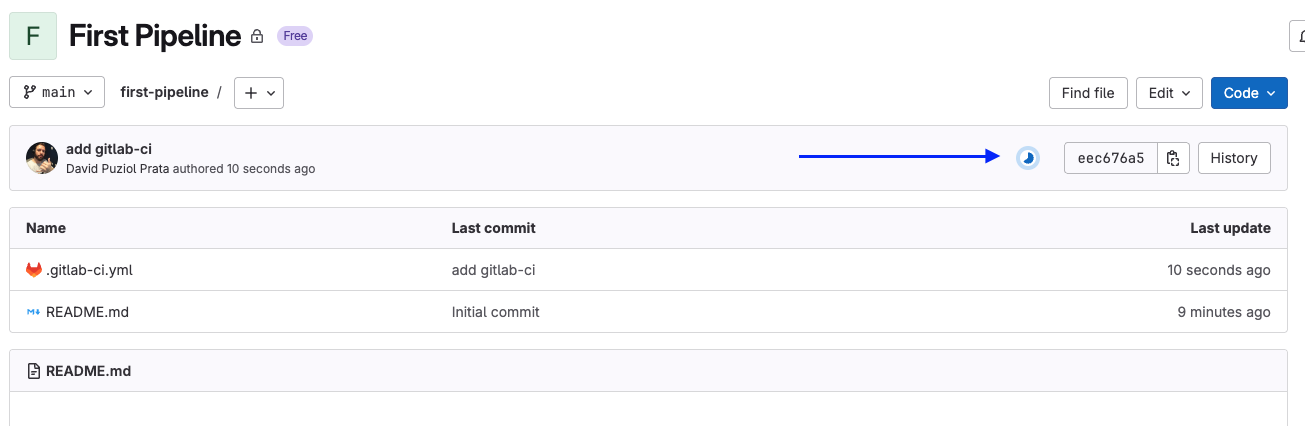
And then completed.

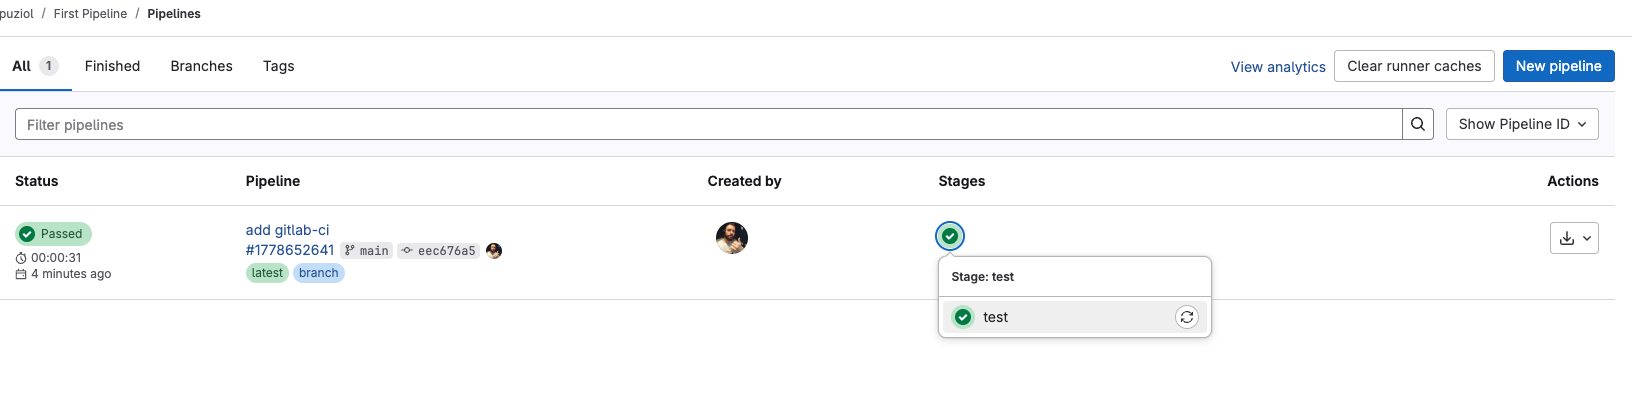
Now the question is, who executed? In build > Pipelines we have the execution.
Clicking inside the stage and then on test we can see the log of this execution.
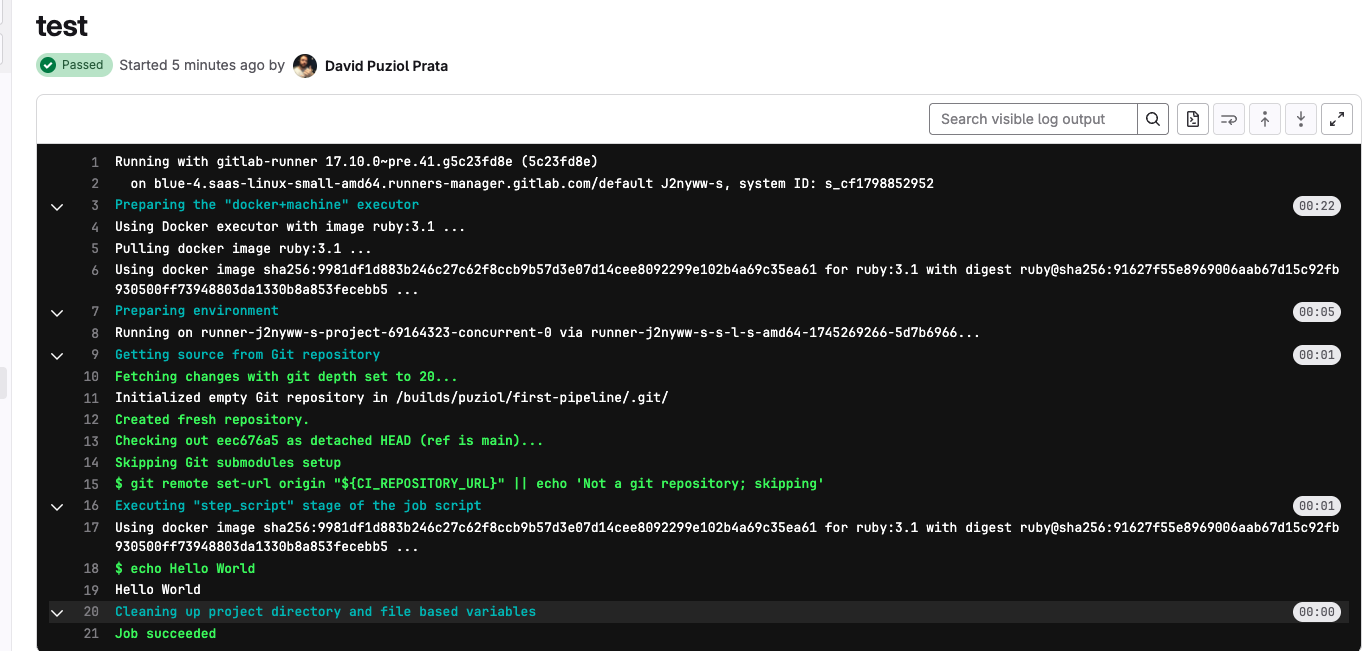
An image that is not the one from the runner we defined was used and the fact that it has "blue-4.saas-linux-small-amd64" indicates it's a GitLab SaaS runner "runners-manager.gitlab.com" confirms it's managed by GitLab itself.
But now I want it to run on the self-hosted runner we created.
Let's change the .gitlab-ci.yml.
# All jobs will have this tag list if not defined.
default:
  tags:
    - general

test:
  # We can define tags whenever we want job by job.
  # tags:
  #   - debian
  script: "echo Hello World"
❯ git add .gitlab-ci.yml

❯ git cm "add gitlab-ci"
[main bae0760] add gitlab-ci
 1 file changed, 0 insertions(+), 0 deletions(-)
 create mode 100644 .gitlab-ci.yml

❯ git push origin main
Who ran the job now? Yes, our runner.
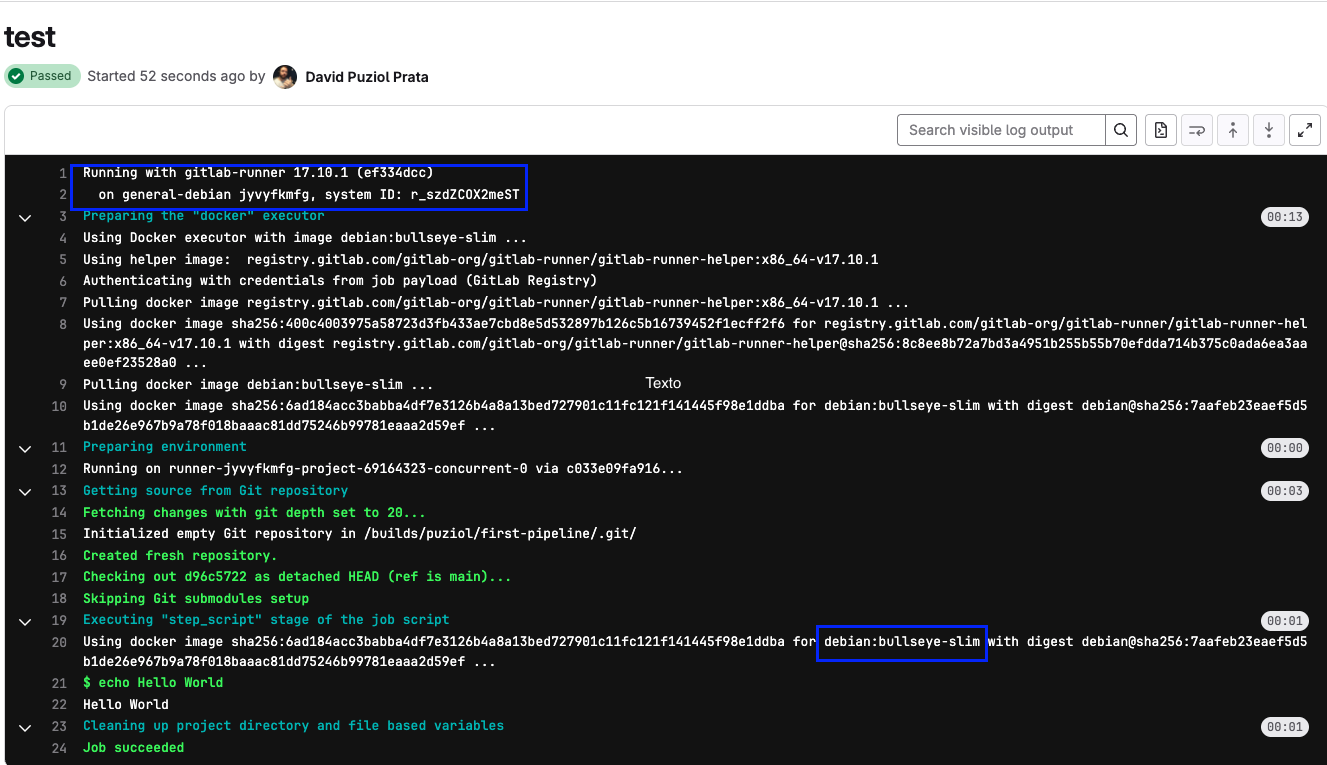
However it ran with the default image, since we didn't define an image.
Just like we did with tags, we could define a default image that would be used by all jobs or we can define a different image per job. Let's replace the image only in the job.
#.gitlab-ci.yml
default:
tags:
- fake # Doesn't exist
test:
tags:
- debian # Replacing the tag to test
image: alpine
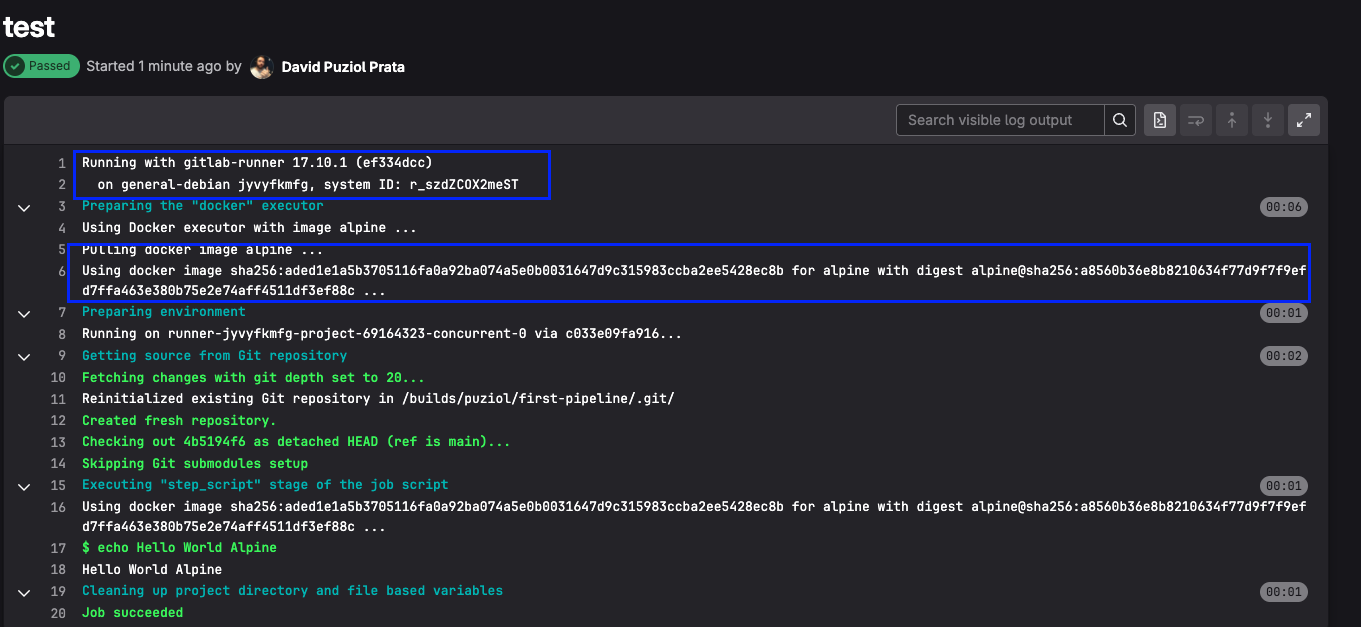
script: "echo Hello World Alpine"
Uploading everything.
❯ git add .gitlab-ci.yml
❯ git commit -m "test cicd with alpine"
❯ git push origin main
And we have the following log.
Let's do two things now at the same time. Edit the pipeline again and check untagged for this pipeline.

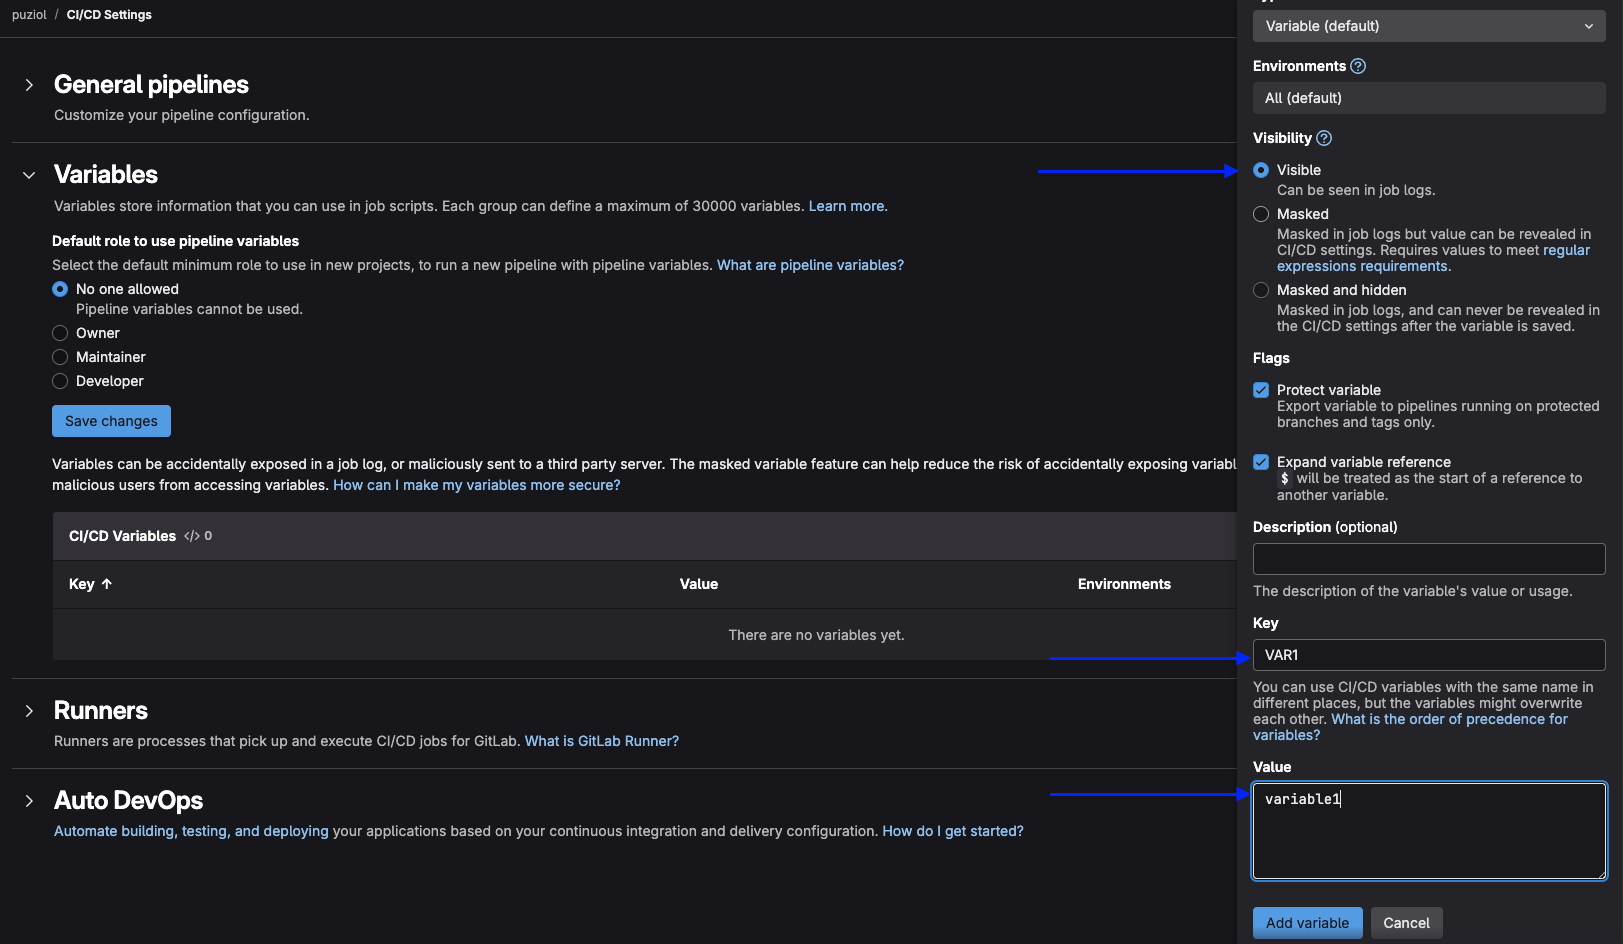
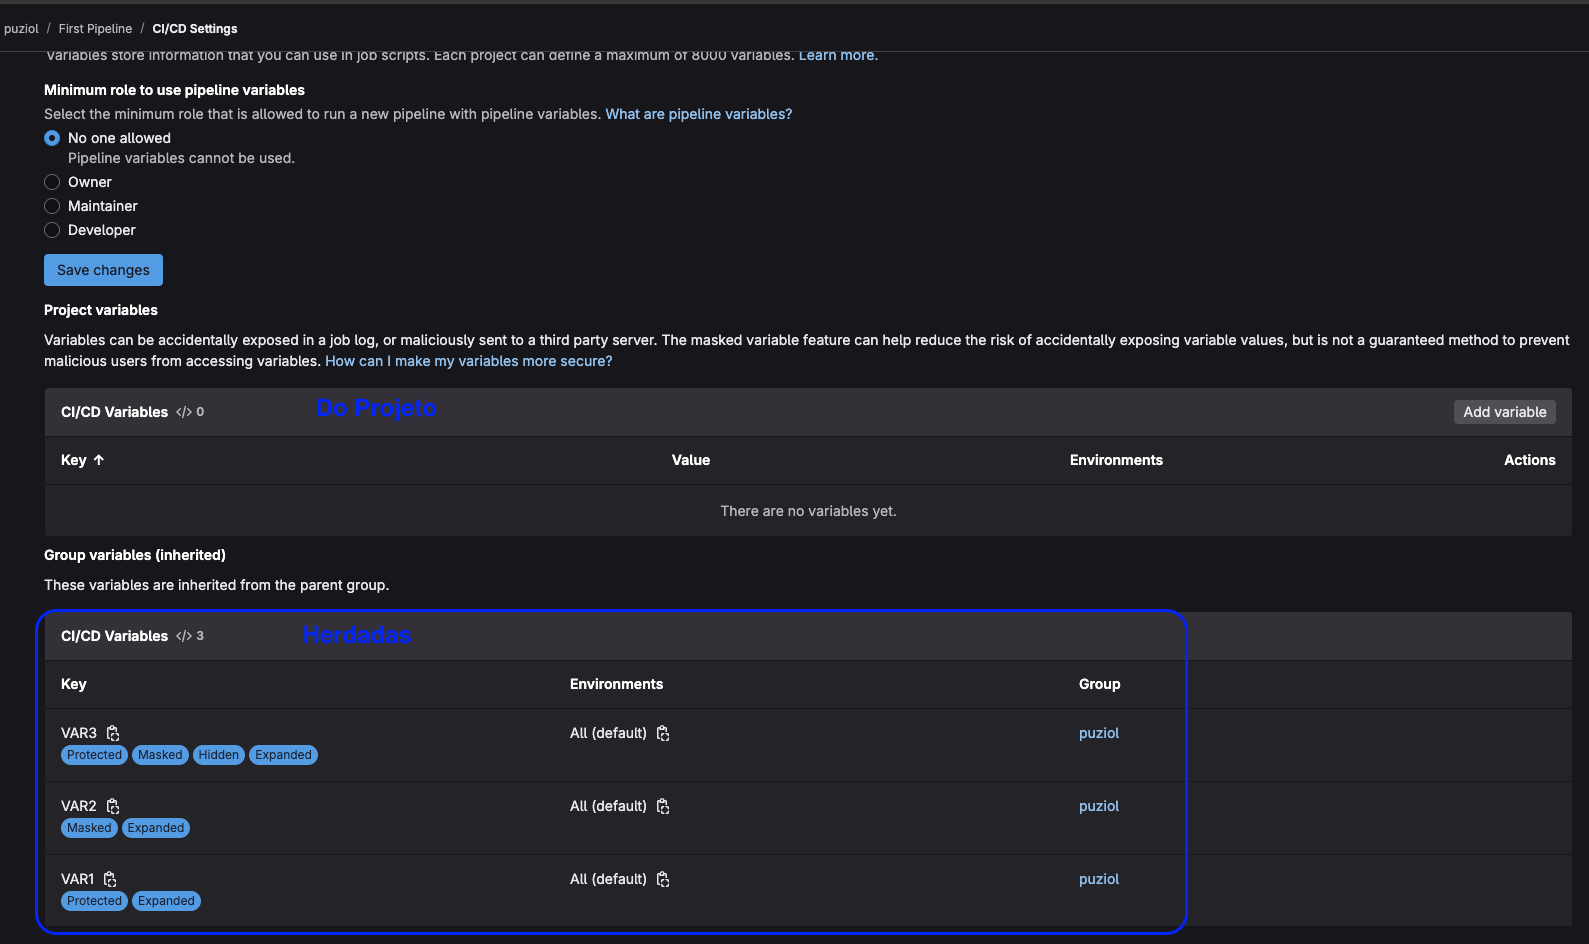
Another thing we'll do is create two group level variables. Go to Settings > CI/CD > Variables.
The first variable will be VAR1 with the value variable1 and we'll leave it as visible.
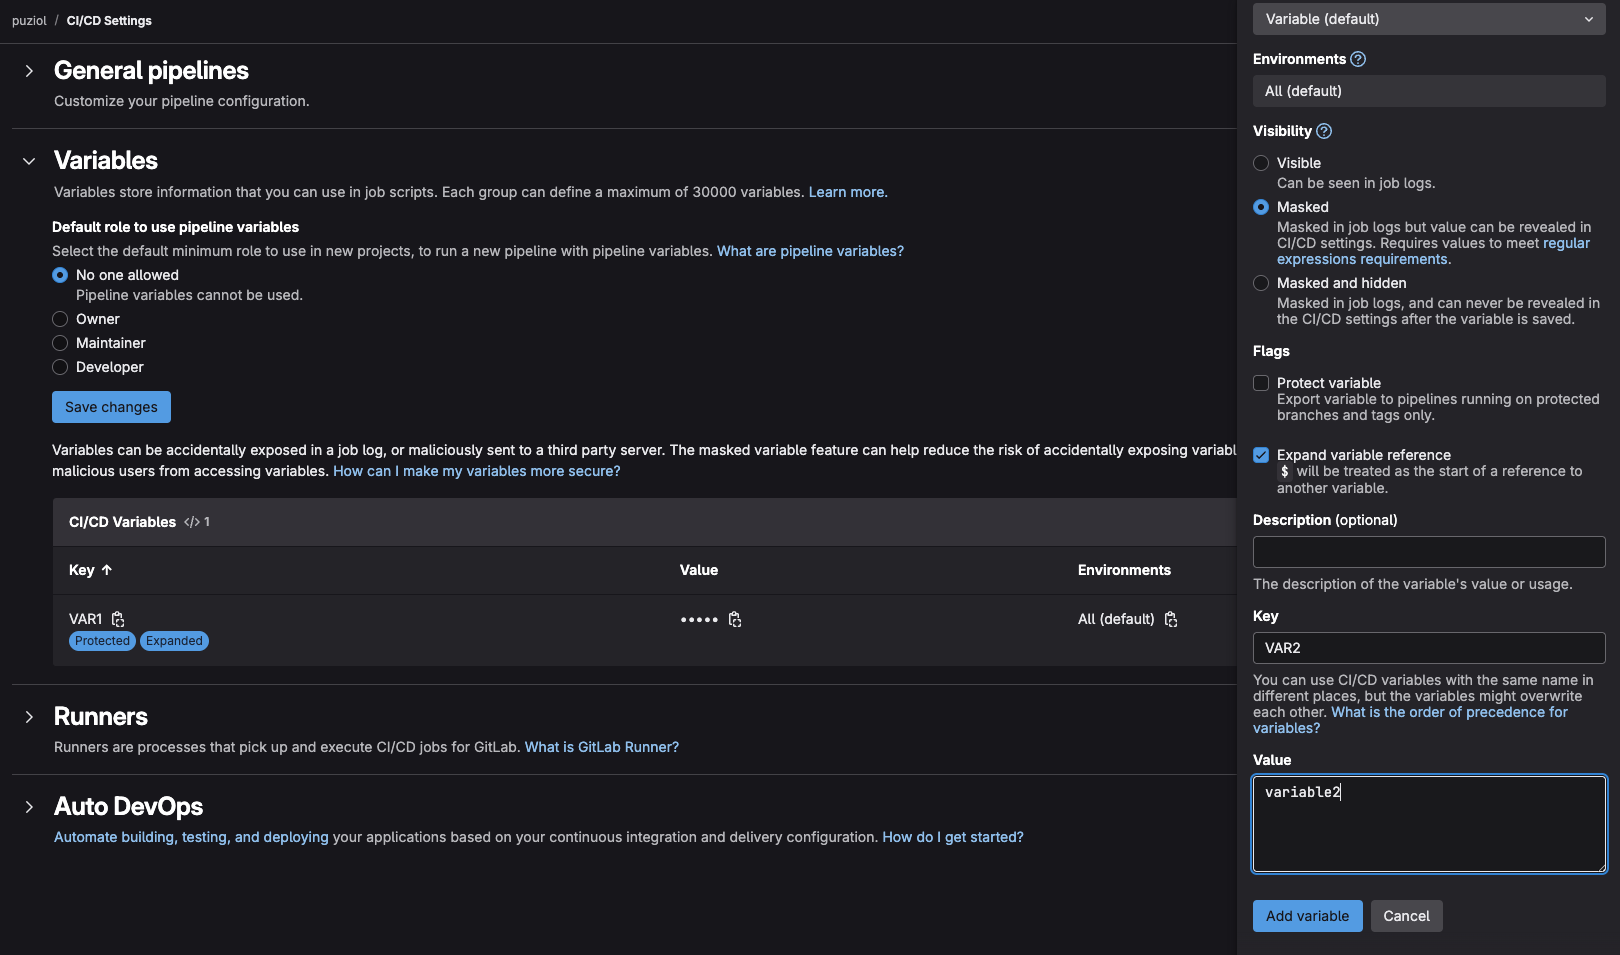
For VAR2 we'll leave it as masked.
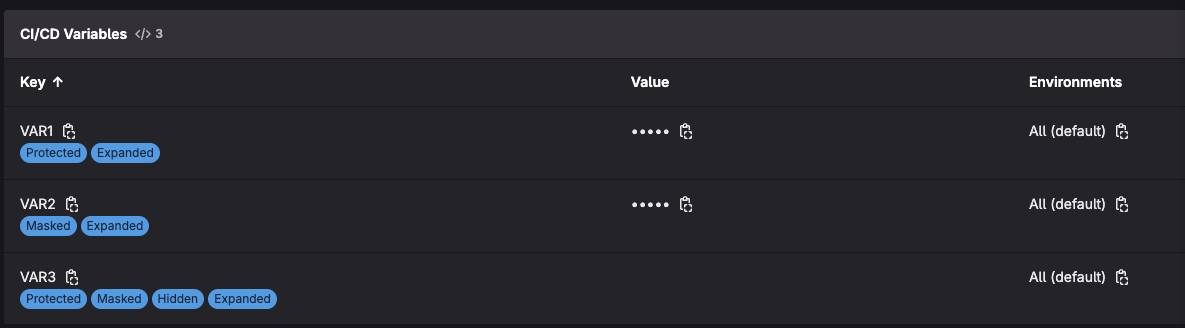
For VAR3 we'll leave it as masked and Hidden.
See that we have differences in how they are shown in the GUI.
Now let's go to the project and see what variables we have. We can observe that we have the variables inherited from the group. This is one of the advantages of using groups and subgroups. We can declare different variables in each group and accumulate declared variables.
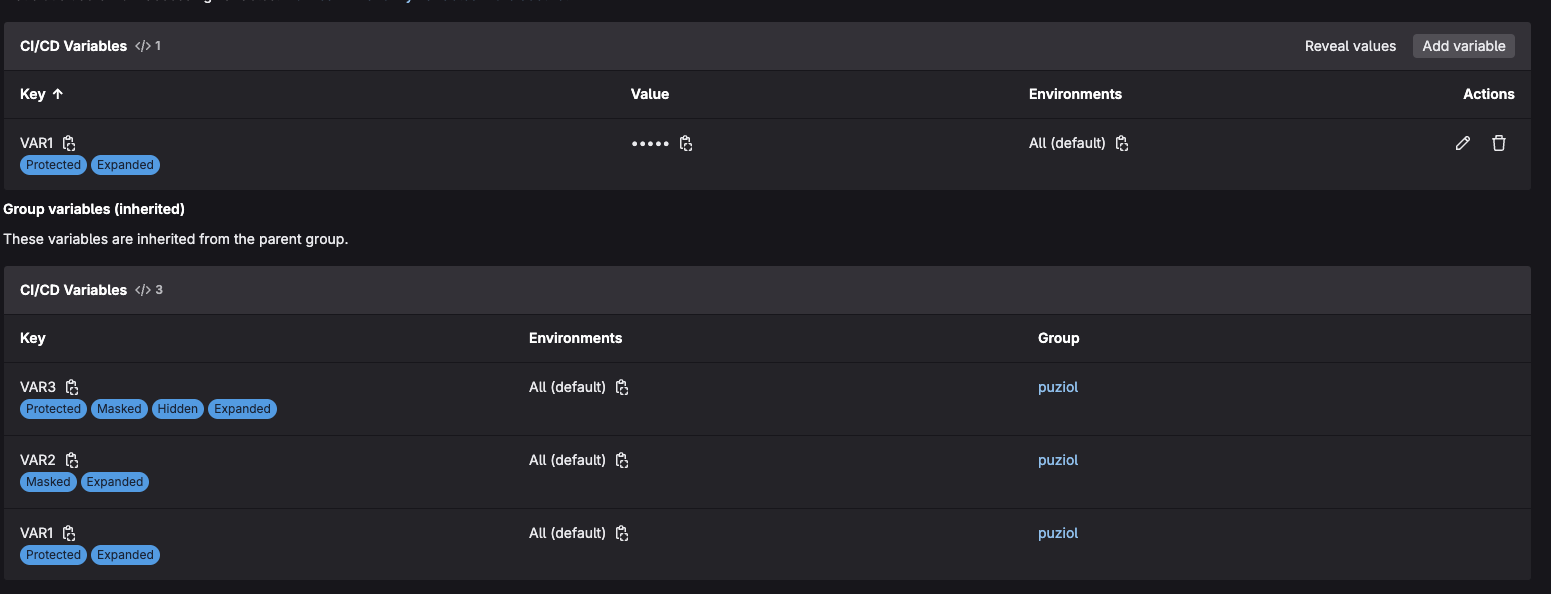
What happens if we declare the same variable? Let's do this for VAR1 by declaring VAR1 again at the project level with the value variable1new.
Note that we cannot edit any variable inherited from a group in the project. We will only have read permission.
# We won't put the tag to see what happens with untagged
test:
  script:
  - echo $VAR1
  - echo $VAR2
  - echo $VAR3
❯ git add .gitlab-ci.yml
❯ git commit -m "test variables and untagged"
❯ git push origin main
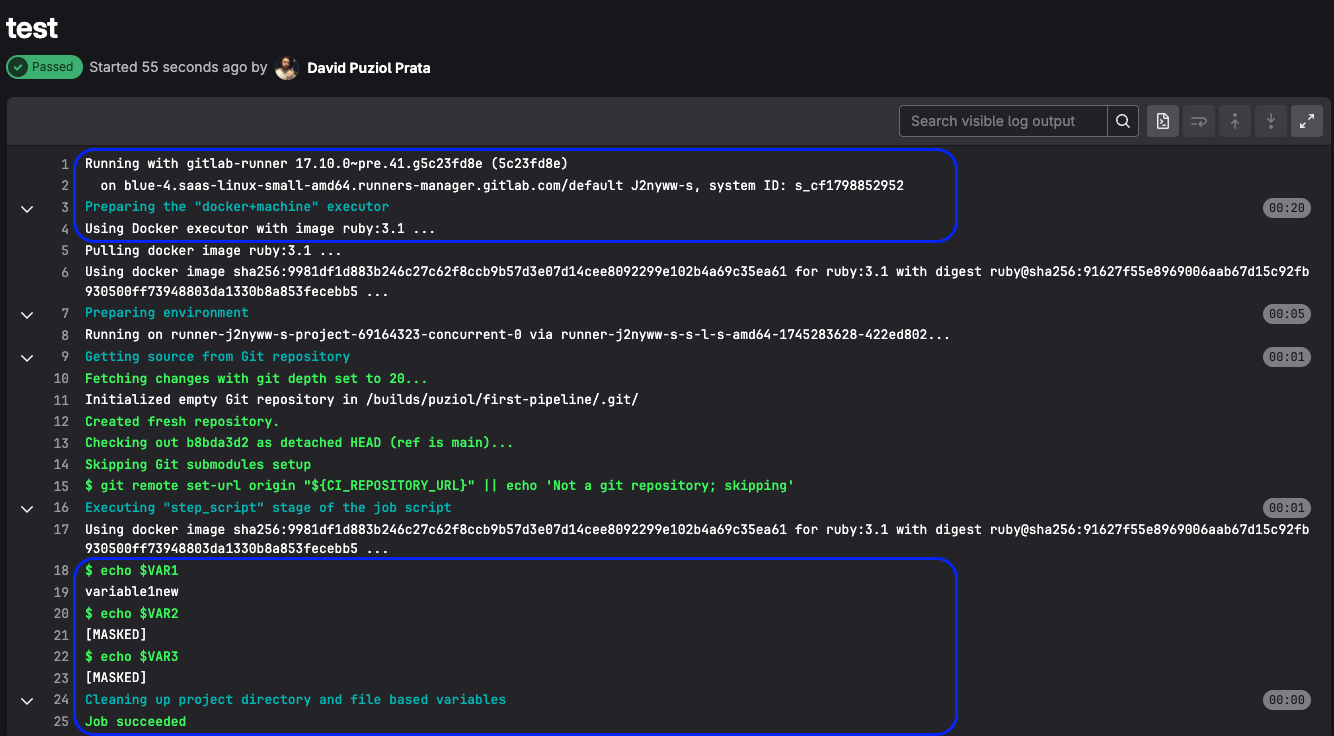
We can observe that a GitLab SaaS shared runner was used. And the masked variables were respected, with the only difference of hidden being at the project display level. The same variable at the project level overwrites the group variable.
Now the question is... Why wasn't our runner used? Actually it could have been used, but it was a matter of lottery.
Let's see what runners I have available in this project.
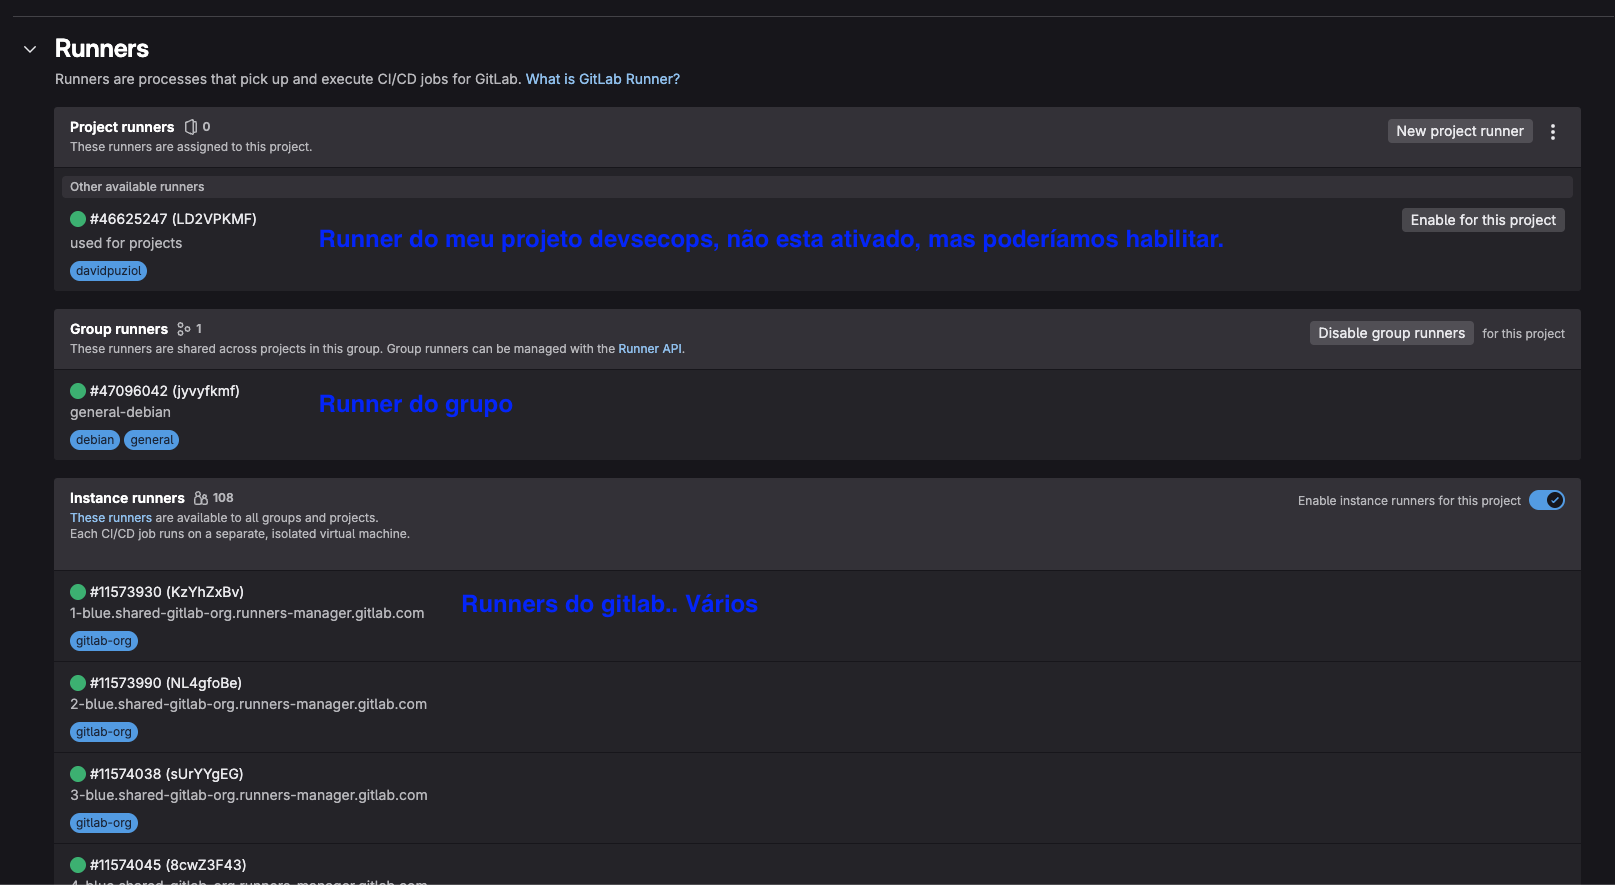
If we disable GitLab runners in the project our runner will act, but we don't need to do this in a project, we can do this at the group level.
An interesting thing is to observe why GitLab is delivering us ruby images as default. The shared runners from GitLab.com run in environments managed by them — and many come with the ruby base image by default, because GitLab is made in Ruby and they assume compatibility with many projects.
Even if your project has nothing to do with Ruby, if you don't specify an image: in .gitlab-ci.yml, GitLab may use a default image — which is frequently something like ruby:2.x in shared runners.
Best Practices About Runners
-
Always declare the base image. Even if you know what the default is, specify it in .gitlab-ci.yml. This avoids surprises if the default changes in the future. Put it at the top of the file.
-
Use specific tags to force the runner. This way, even if GitLab's shared runners are available, your runner will be prioritized.
-
Use a custom image with everything you need. If you have freedom to choose the image, mount one with all dependencies. This avoids unnecessary installations and speeds up the pipeline, we'll do this later when we talk about performance.
-
Organize your variables well. GitLab variables are passed as environment variables to runners. Put common ones in groups and only keep specific ones in the project. This way, if you need to change something global, you won't have to edit project by project.
Other tips will come with our learning.
Hosted GitLab Runner
As we saw before, we can also use shared runners, but we can choose GitLab runners if we don't want our own.