Kubernetes Plugins
This plugin allows developers to check the health of services without needing direct access to the cluster.
The idea is to increase visibility of identified errors and provide details about deployments, pods, and other objects of a service.
The plugin is divided into two parts: the frontend part (installed in the app) that displays the information, and the backend part that communicates with the cluster to collect data.
To install the Kubernetes plugin, we have two steps. The first is done in the frontend (app) and the second is done in the backend.
App
In the backstage root directory
yarn --cwd packages/app add @backstage/plugin-kubernetes
Now let's add the page in the code at packages/app/src/components/catalog/EntityPage.tsx.
Generally, this part already comes in the code if you're using the most recent versions.
// It will only show when isKubernetesAvailable is true, meaning if the correct annotation is present.
const serviceEntityPage = (
  <EntityLayout>
    {/* other tabs... */}
    <EntityLayout.Route
      path="/kubernetes"
      title="Kubernetes"
      if={isKubernetesAvailable}
    >
      <EntityKubernetesContent refreshIntervalMs={10000} />
    </EntityLayout.Route>
  </EntityLayout>
);
Backend
Installing the dependencies.
yarn --cwd packages/backend add @backstage/plugin-kubernetes-backend
And inside packages/backend/src/index.ts before backend.start() let's add the line below. In newer backstage code, it's usually already added.
backend.add(import('@backstage/plugin-kubernetes-backend'));
The plugin configurations are defined in app-config.yaml. There are several ways to add the cluster and perform authentication. It's interesting that we have a service account for backstage as was done in the lab, but with the correct permissions.
kubernetes:
  serviceLocatorMethod:
    type: 'multiTenant'
  clusterLocatorMethods:
    - type: 'config'
      clusters:
        - name: 'kind-study'
          url: 'https://localhost:6443'  # Verify if this is the correct Kind URL
          authProvider: 'serviceAccount'
          skipTLSVerify: true
          skipMetricsLookup: true
          serviceAccountToken: ${KUBERNETES_BACKSTAGE_SA_TOKEN}
To make it work, you need to add the annotation. What it does is search for the resource with the correct labels to display.
In the backstage-argocd-app project that is using ArgoCD, all resources of the same application node-frontend receive the tag app.kubernetes.io/instance=node-backend, we can filter by this tag for example.
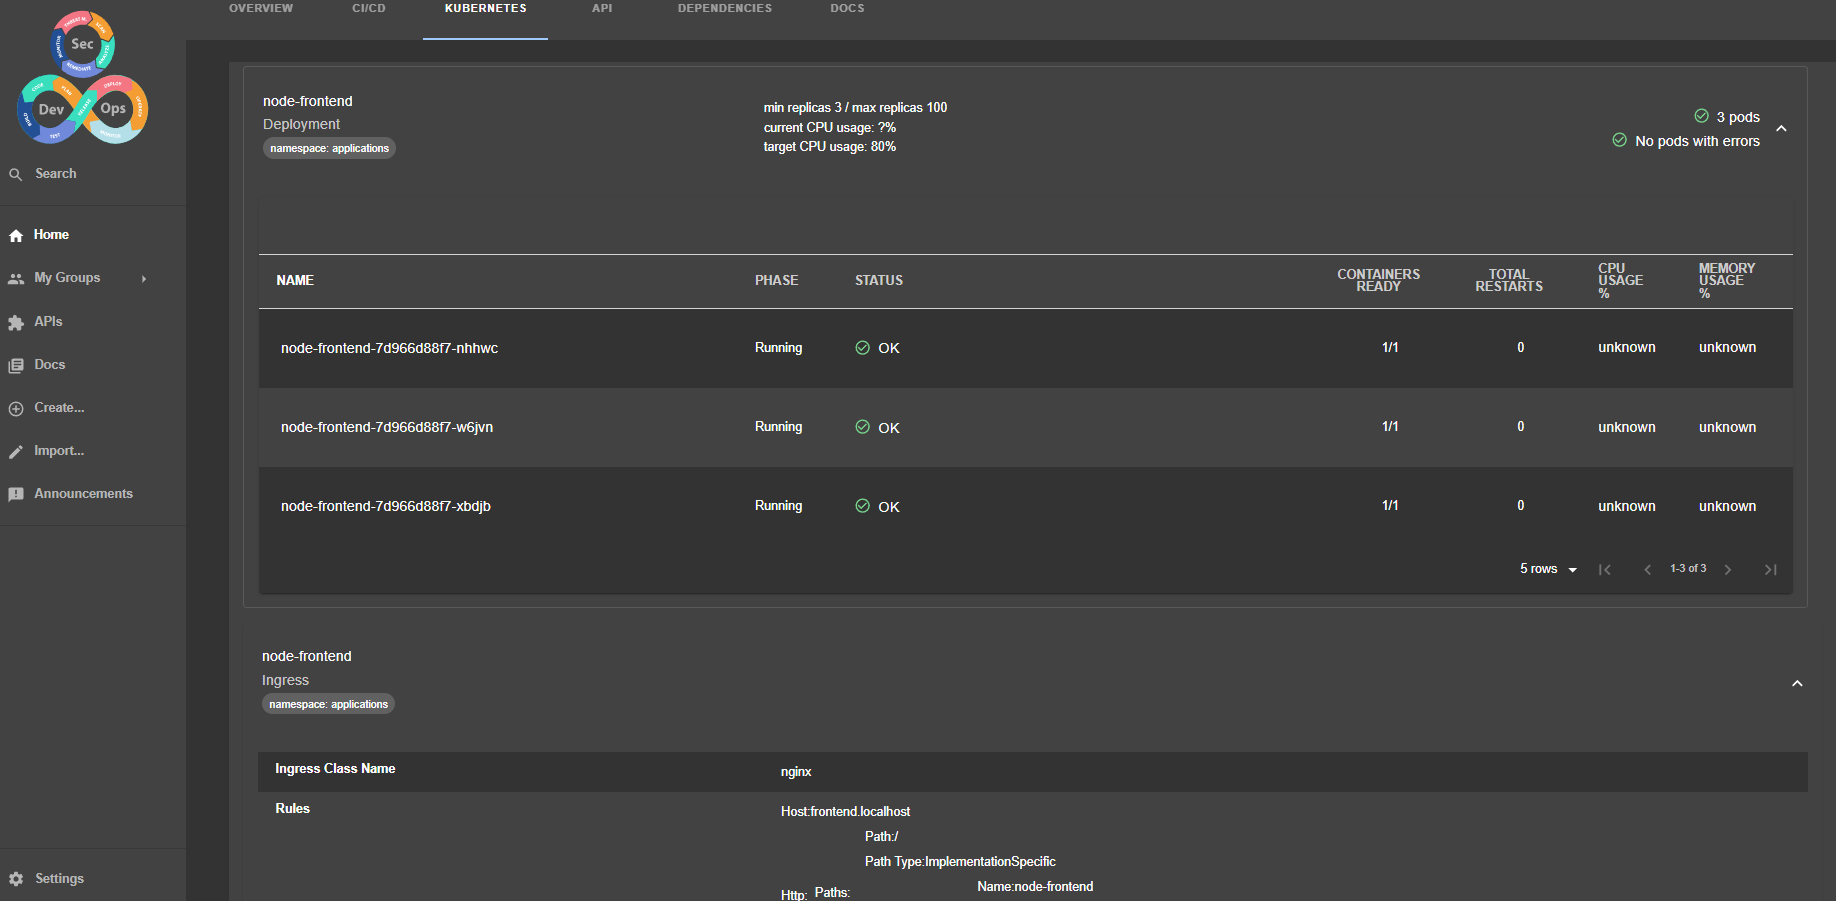
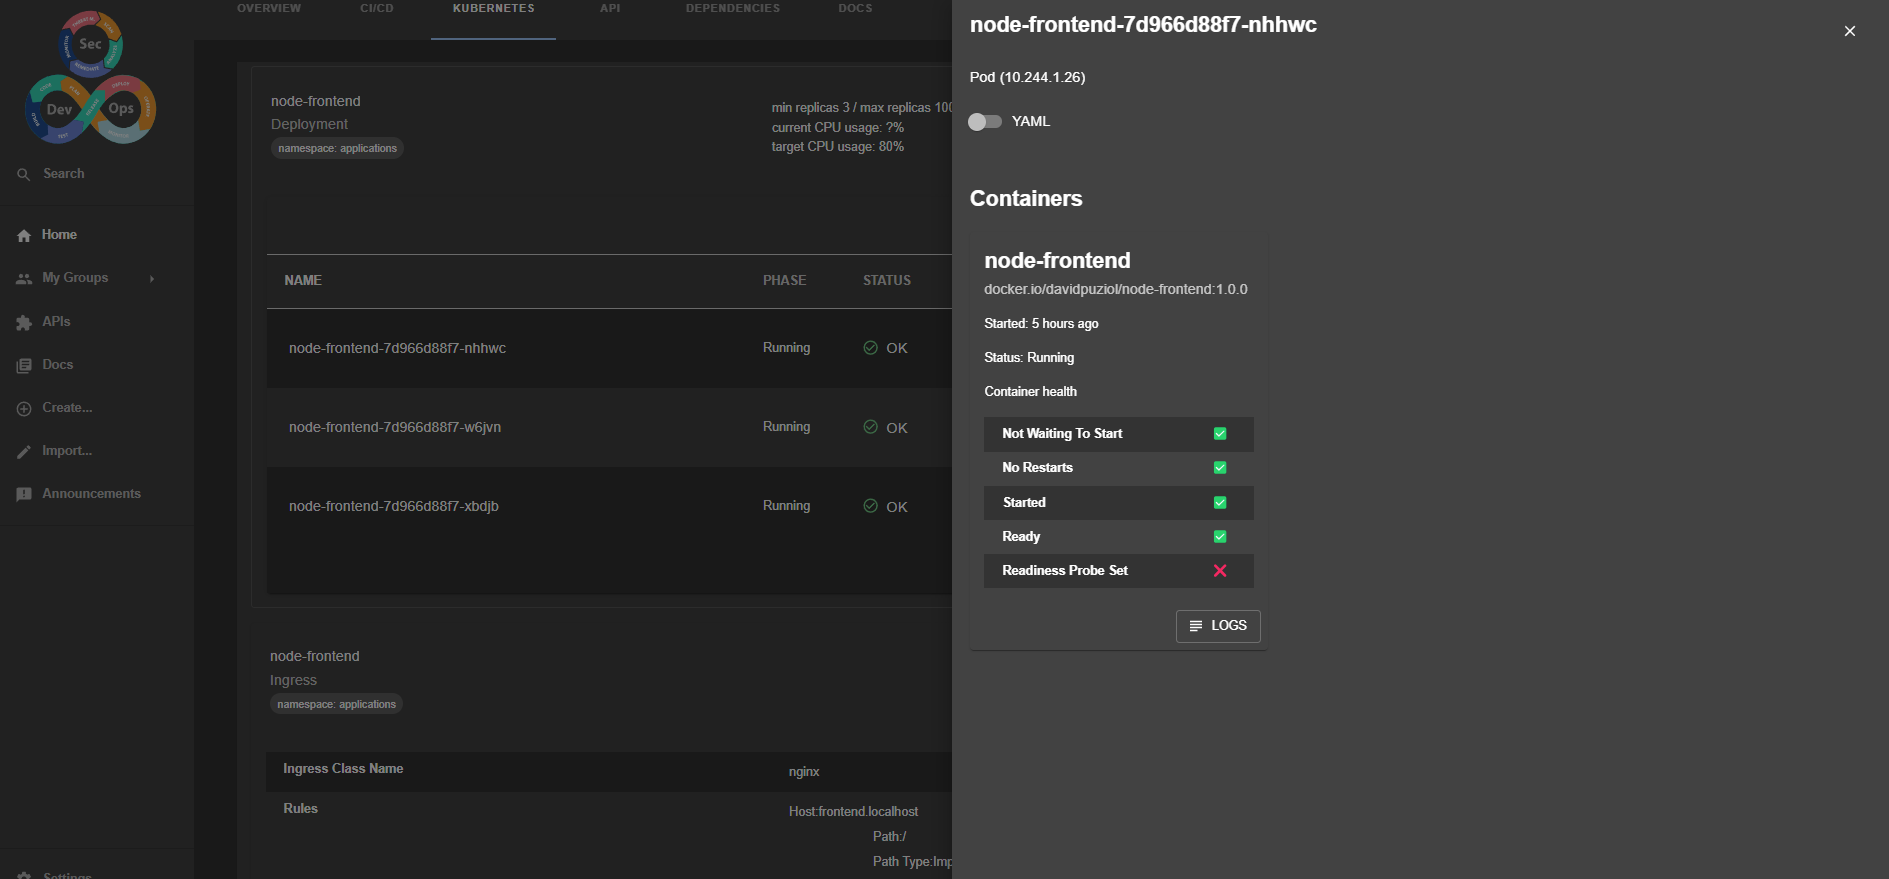

We can view the logs, the yaml, and change the behavior of buttons to delete a pod for example.
It's necessary to dive deeper into this subject as it has many configurations leveraging Kubernetes custom resources.
Cluster Resource
We can add the cluster as a resource to be related to others.
In backstage itself, we can use the location to create a fixed resource. Create a clusters folder and define the resource below.
tree clusters
clusters
└── kind.yaml
Here is the kind.yaml that is actually creating a resource that represents the cluster.
apiVersion: backstage.io/v1alpha1
kind: Resource
metadata:
  name: kind-study-cluster
  description: "Kubernetes Cluster for local study"
  tags:
    - kubernetes
  links:
    # useful link to access the cluster dashboard
    - url: https://dash.localhost
      title: Kubernetes Dashboard
      icon: dashboard
spec:
  type: kubernetes-cluster
  owner: team-sre
In api-config.yaml we can add this resource.
catalog:
  ,...
  locations:
    - type: file
      target: ../../clusters/kind.yaml