Software Templates
It is a tool that can help you create anything within Backstage. By default, it has the ability to load code schemas, template in some variables, and then publish the filled code to a repository.
- They are pre-defined templates that facilitate the creation of new objects in Backstage, such as components, APIs, services, frontends, or any other type of software and infrastructure as code.
- These templates can include folder structures, initial configurations, boilerplate code, and basic integrations (such as CI/CD or monitoring).
- The idea is to save time and ensure that new projects follow the architecture and security standards defined by the organization.
I like this feature because it allows standardization by ease rather than standardization by restriction, where some policy in the organization imposes rules without explaining how to implement your code.
This is the part of Backstage that will bring self-service to developers. Most of the work consists of creating templates!
Scaffolder
- It is the engine responsible for processing templates and generating new projects/code.
- It uses YAML configuration files to define the inputs (parameters) and the steps (actions) necessary to create a new component or resource.
- New actions are made available through plugins.
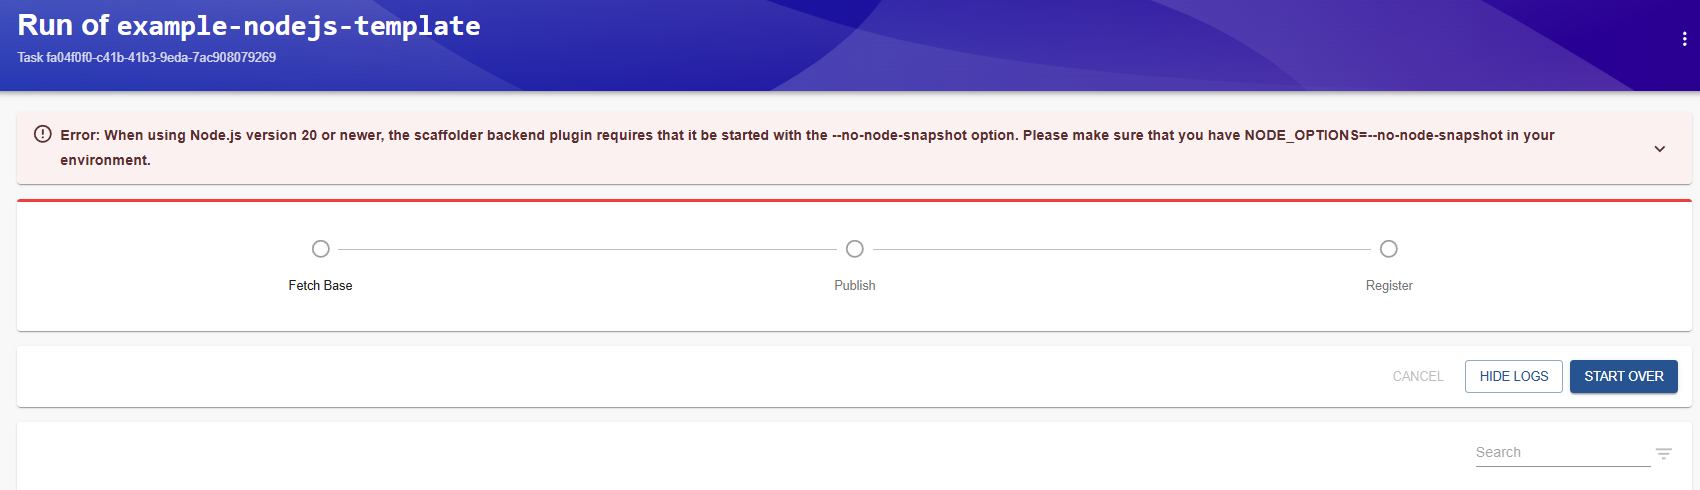
According to the documentation, using node from version 20 onwards, you need to run with the --no-node-snapshot parameter (NODE_OPTIONS=--no-node-snapshot) for the scaffolder to work.
# We can put the parameters that node uses directly in an environment variable. Obviously we will use this later when running Backstage in a container.
export NODE_OPTIONS=--no-node-snapshot
Advantages
- Automation: Reduces the need to create projects manually, avoiding errors.
- Consistency: Ensures that all projects follow the same organizational guidelines.
- Scalability: Helps adopt best practices quickly in teams of all sizes.
- Easier onboarding: New developers can quickly start with a solid project foundation.
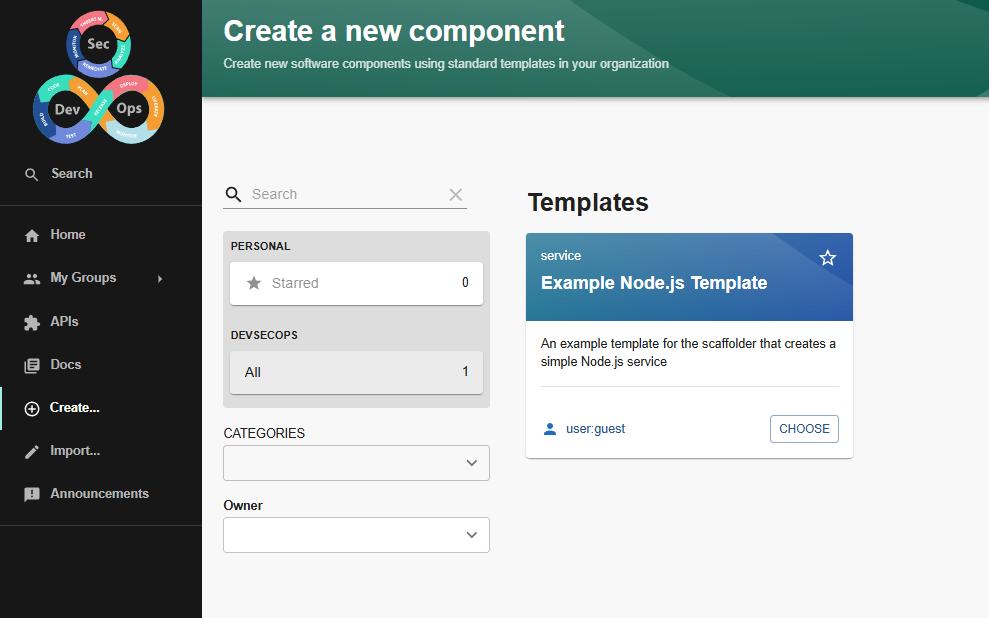
If a developer wants to start building a new service, an application, a component, a resource, whatever it may be, they can go to the /create section and fill out a form from a ready template.
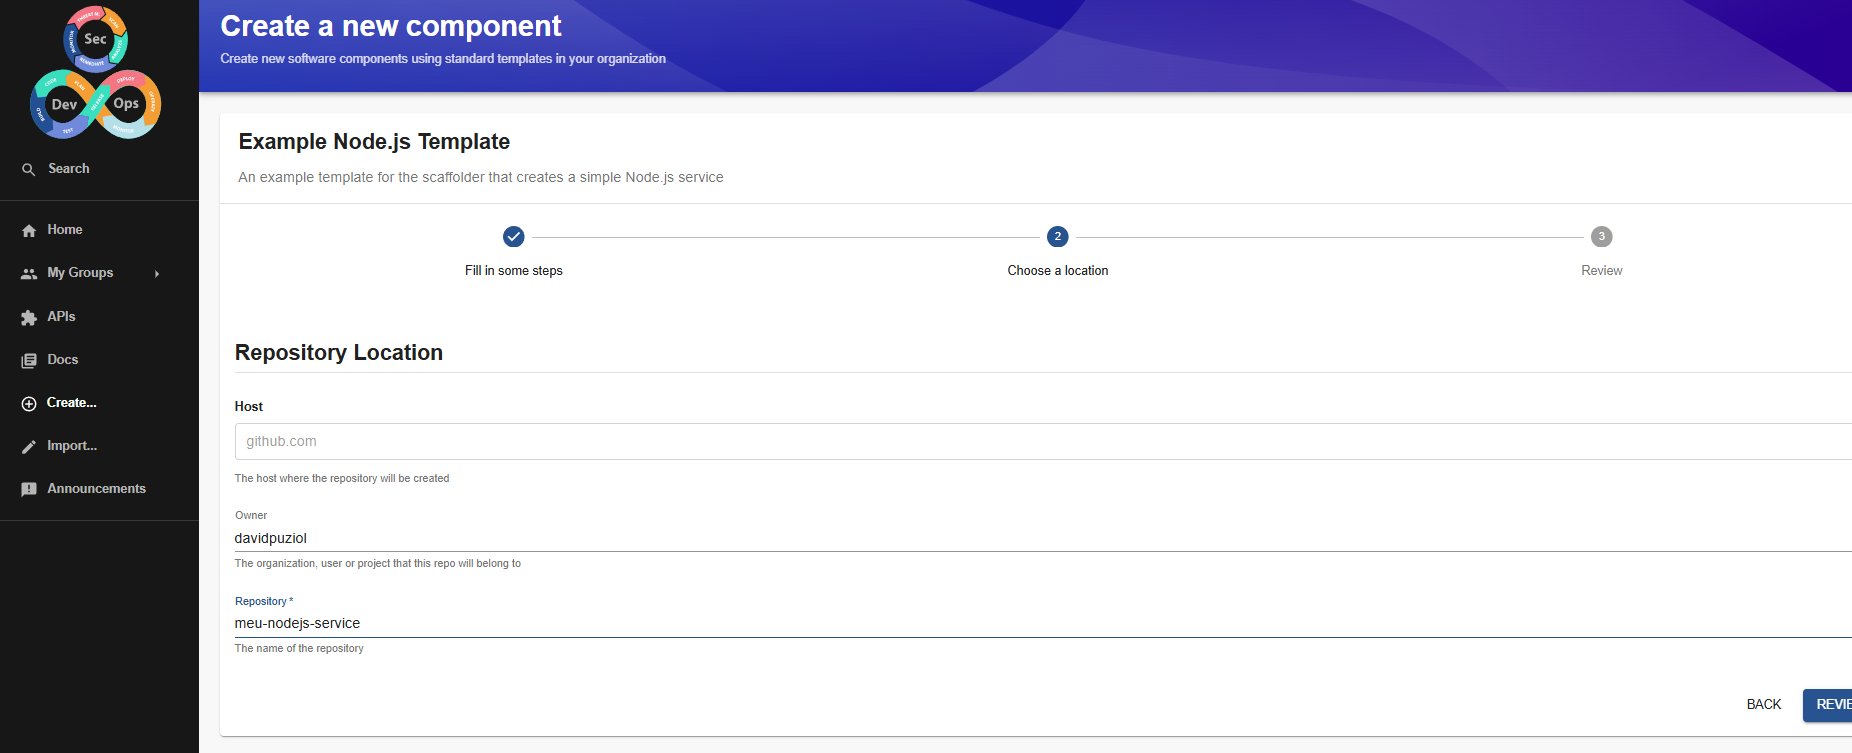
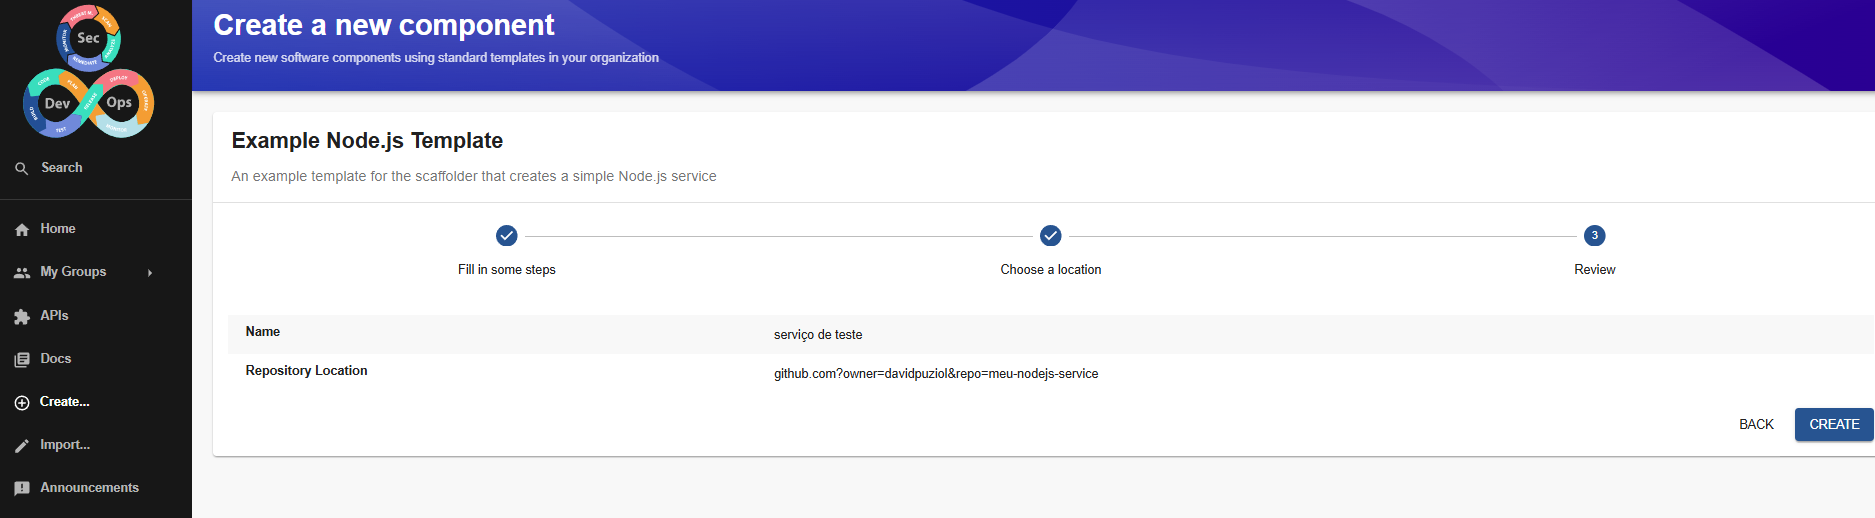
Template Basics
The template consists of creating a form (defining values) that will be passed as parameters, and from these we execute sequential actions. Yes yes... it's very similar to a pipeline.
Tell us what you want by choosing a template, provide the necessary data, and we'll give you the ready schema.
There is an example that comes with Backstage itself for creating a nodejs service.
I ran it without the --no-node-snapshot parameter to see what happens.
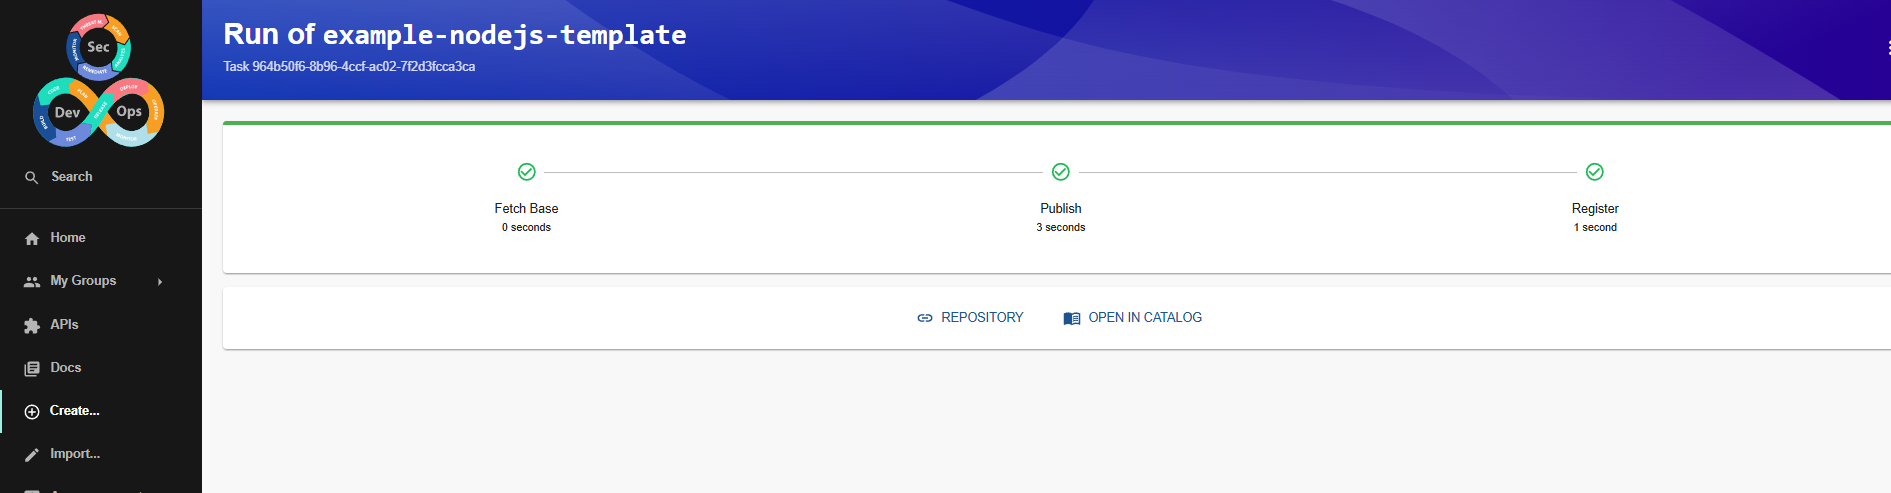
Now with the parameter.
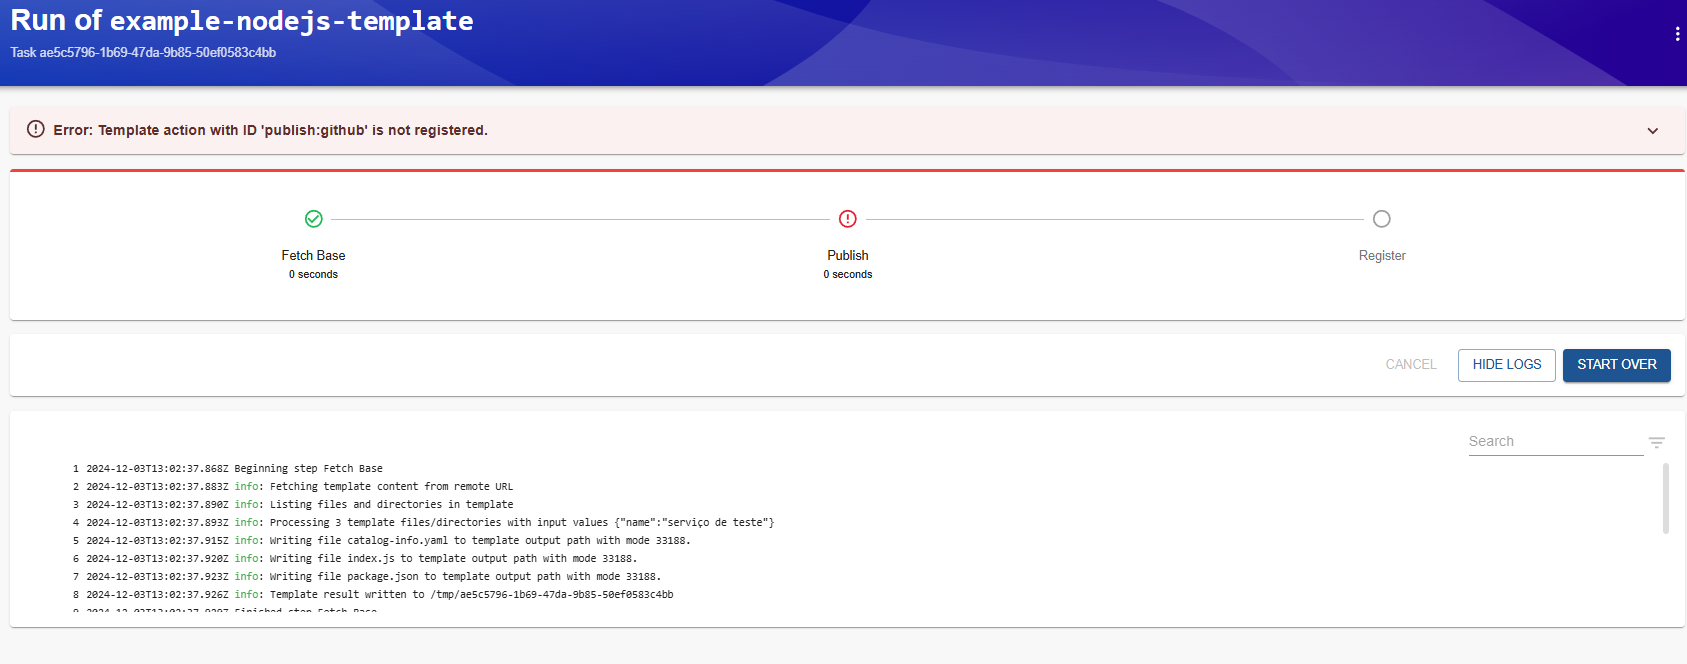
Now we have another problem. The idea was to create a repository with a nodejs development model and obviously it will generate code to publish to the chosen repository. The problem is that this Backstage is missing the plugin that executes the publish action, so we need to add it.
yarn --cwd packages/backend add @backstage/plugin-scaffolder-backend
# If you want, also add gitlab if it's configured in integrations.
And add it to be loaded in packages/backend/src/index.ts.
backend.add(import('@backstage/plugin-scaffolder-backend-module-github'));
// If you want to use gitlab, also add it below
backend.add(import('@backstage/plugin-scaffolder-backend-module-gitlab'));
We can define what the initial commit message will be, the author, the email, etc.
And restart Backstage. Then try again. If we look at the code of this template, we can understand what will happen.
scaffolder:
  defaultAuthor:
    name: Backstage Scaffolder # Default is Scaffolder
    #email: [email protected] # This is the default if not defined
  #defaultCommitMessage: "Initial commit" # This is also the default
apiVersion: scaffolder.backstage.io/v1beta3
# https://backstage.io/docs/features/software-catalog/descriptor-format#kind-template
kind: Template # The type
metadata:
  name: example-nodejs-template # template name
  title: Example Node.js Template
  description: An example template for the scaffolder that creates a simple Node.js service
spec:
  # Will be used in the spec of the created component
  owner: user:guest
  type: service

  # These parameters are used to generate the input form in the frontend, and are
  # used to gather input data for the execution of the template.
  # THE PARAMETERS THAT WILL BE NEEDED IN THE ACTIONS WE WILL USE IN THE STEPS.
  parameters:
    - title: Fill in some steps
      required:
        - name
      properties:
        name:
          title: Name
          type: string
          description: Unique name of the component
          ui:autofocus: true
          ui:options:
            rows: 5
    - title: Choose a location
      required:
        - repoUrl
      properties:
        repoUrl:
          title: Repository Location
          type: string
          ui:field: RepoUrlPicker
          ui:options: # The options we can choose
            allowedHosts:
              - github.com
              - gitlab.bom # Added

  steps:
    - id: fetch-base
      name: Fetch Base
      action: fetch:template
      input:
        url: ./content # Where the fill template is located
        values:
          name: ${{ parameters.name }}

    - id: publish
      name: Publish
      action: publish:github # This is where the problem happened, we didn't have this action available.
      input:
        allowedHosts: ['github.com']
        description: This is ${{ parameters.name }}
        repoUrl: ${{ parameters.repoUrl }}
        #repoVisibility: private # or 'internal' or 'public'. private is the default.

    # The final step is to register our new component in the catalog.
    - id: register
      name: Register
      action: catalog:register
      input:
        repoContentsUrl: ${{ steps['publish'].output.repoContentsUrl }}
        catalogInfoPath: '/catalog-info.yaml'

  # Generated outputs
  output:
    links:
      - title: Repository # The link to the repository coming from the publish step
        url: ${{ steps['publish'].output.remoteUrl }}
      - title: Open in catalog # catalog link for this entity.
        icon: catalog
        entityRef: ${{ steps['register'].output.entityRef }}
See the outputs.
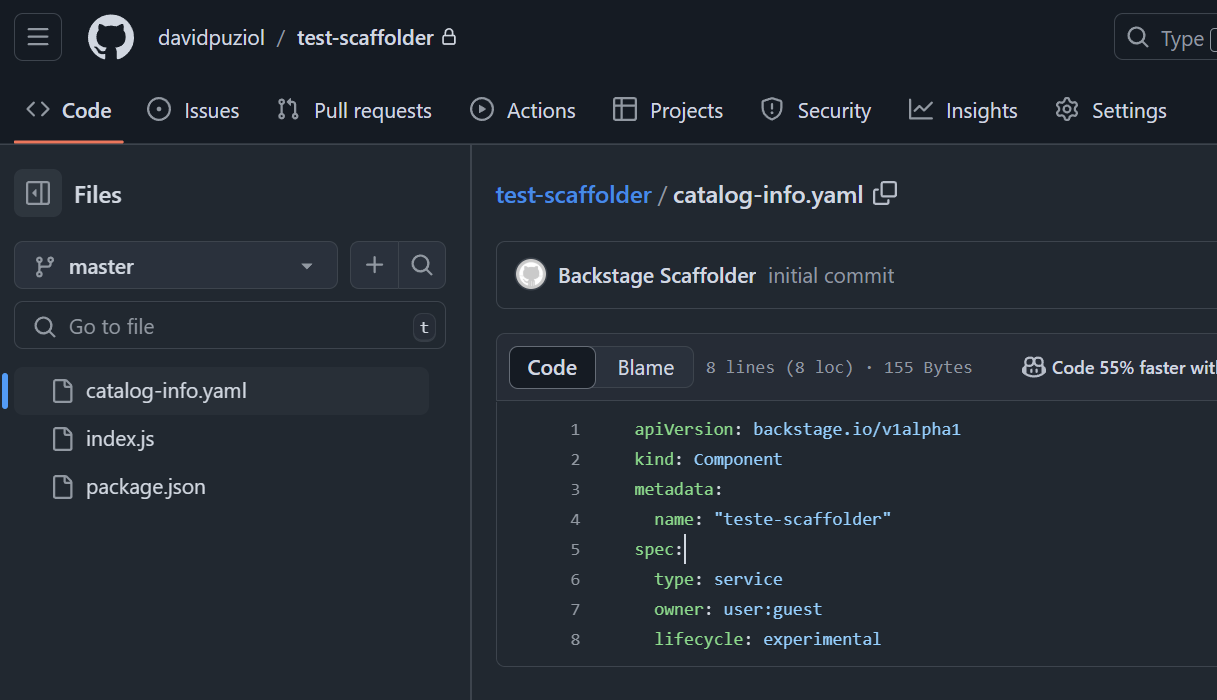
In the repository it created, we already have the catalog-info.yaml in the root and some other files.
Going even deeper, this template was included directly in app-config.yaml. We'll remove it shortly, but let's first look at what we have.
tree
.
├── entities.yaml # Some entity examples
├── org.yaml  # User and group
└── template # this folder is what interests us.
    ├── content
    │   ├── catalog-info.yaml
    │   ├── index.js
    │   └── package.json
    └── template.yaml

3 directories, 6 files
In the template definition, we can observe that the fetch-base action uses the files in ./content and everywhere we have name will receive the name parameter that was passed during the template call.
  parameters:
    - title: Fill in some steps
      required:
        - name
      properties:
        name: ## <<<
          title: Name
          type: string
          description: Unique name of the component
          ui:autofocus: true
          ui:options:
            rows: 5
    - id: fetch-base
      name: Fetch Base
      action: fetch:template
      input:
        url: ./content # Where the fill template is located
        values:
          name: ${{ parameters.name }}
Taking one of the files, we have this.
console.log('Hello from ${{ values.name }}!'); // Will be filled in
And in the repository it became this console.log('Hello from teste-scaffolder!');
An interesting thing when creating templates is to group them by tag on the create page that shows the templates. When creating templates, try to use tags.
const routes = (
  <FlatRoutes>
    {/* ... */}
    {/* <Route path="/create" element={<ScaffolderPage />} /> */}
    <Route
      path="/create"
      element={
        <ScaffolderPage
          groups={[
            {
              title: "infra",
              filter: entity =>
                entity?.metadata?.tags?.includes('infra') ?? false,
            },
            {
              title: "code",
              filter: entity =>
                entity?.metadata?.tags?.includes('code') ?? false,
            },
          ]}
        />
      }
    />
     {/* ... */}
  </FlatRoutes>
);
Understanding the process, let's then delete these folders and remove the locations from app-config.yaml referring to them since we won't need them anymore.
Curiosity, what happens if we delete this resource? There is the process of deleting the entity and unregistering.
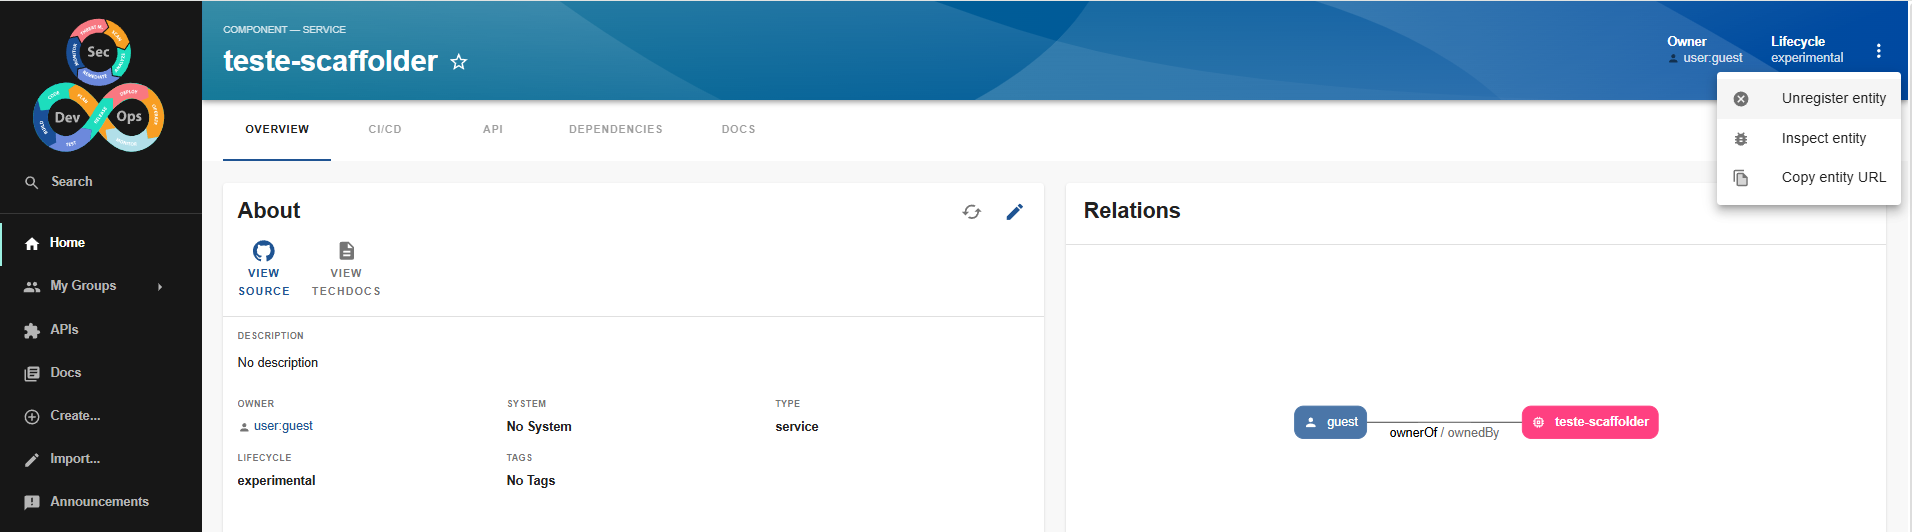
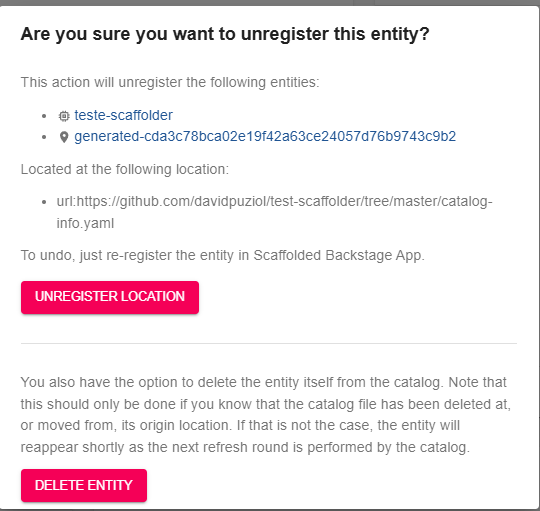
If we delete the entity, it will reappear because the catalog was configured to synchronize with what we have in the repository from time to time.
Unregistering will prevent the repository from being read again and all entities from the repository will be deleted.
fetch:template vs fetch:cookiecutter
Backstage decided to simplify template creation by replacing Handlebars and Cookiecutter with Nunjucks:
Before, there were several template languages (Handlebars and Cookiecutter), which made everything more confusing and complicated to maintain. Now, Nunjucks is the default language to unify everything. Why the change?
- Fewer external dependencies.
- More integrated and flexible features (advanced filters, for example).
- More consistent syntax similar to Jinja2, making it easier to use.
Old templates will need to be updated, although it's simple. If you're starting with Backstage today, it's good to go straight to fetch:template, even if you see some tutorials using cookiecutter.
Cookiecutter is still more powerful than templates, but it will be for a short time.